|
|
|
|
|
City Table
To Enter or Modify a City Table:
- Select the menu group.
- Select the component. The City Information page - Find an Existing Value tab is displayed.
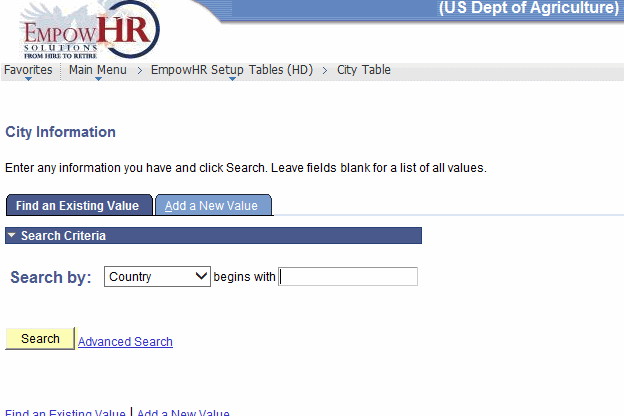
- Enter the applicable search information.
- Click . The City Information tab is displayed.
OR
Select the tab. The City Information page - Add a New Value tab is displayed.
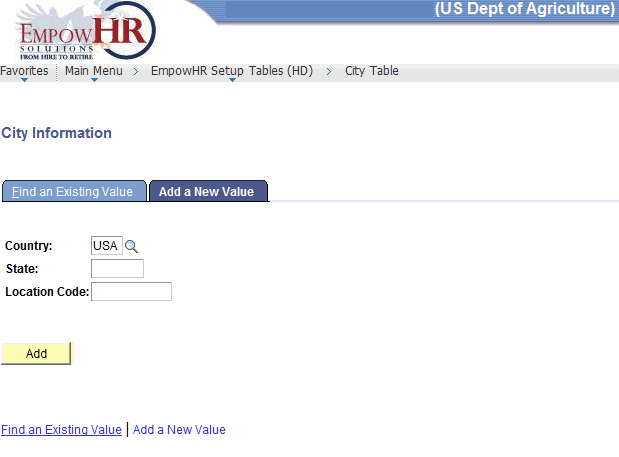
- Complete the fields as follows:
Field
Instruction
Country
Defaults to . Change the data by clicking the search icon.
State
Enter the two-position numeric State code.
Location Code
Enter the numeric location code.
- Click . The City Information tab is displayed.
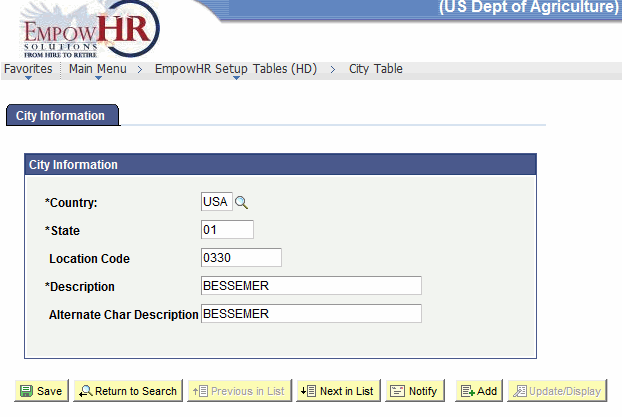
- Complete the fields as follows:
Field
Instruction
City Information
Instruction
*Country
Required field. Defaults to . To change the country, search data by clicking the search icon.
*State
Required field. Defaults to the State entered on the Find an Existing Value or Add a New Value tabs. Change the numeric State code if applicable.
Location Code
Defaults to the location code entered on the Find an Existing Value or Add a New Value tabs. Change the four-position numeric location code if applicable.
*Description
Required field. Enter the location description.
Alternate Char Description
Enter the alternate description.
- Click to save the document. At this point, the following options are available:
Step
Action
Click
Returns the user to the applicable page to search for another city.
Click
Returns the user to the previous tab.
Click
Accesses the next city entered.
Click
Notifies the next individual in the workflow.
Click
Returns the user to the applicable page to add an accounting station code.
Click
Returns the user to the applicable page to update the data entered.
See Also |