Skip to Main Content

webTA 4.2 HR Administrator

Previous Topic

Next Topic

Book Contents

Book Index

Adding Employees

HR Administrators have the ability to add new employees to webTA. This function should only be used if the NFC Daily Feed has not created the record and/or the EmpowHR record has not been updated and T&A entry needs to begin. This function should only be used in extreme circumstances. The preferred way for profile creation is from the NFC Daily Feed file.

If manual addition is necessary, there are several components to be completed. These are:

To Add an Employee to webTA:

  1. Select the Add Employee link from the Employees menu on the HR Administrator Main Menu page. The Employee Profile - New User page is displayed.
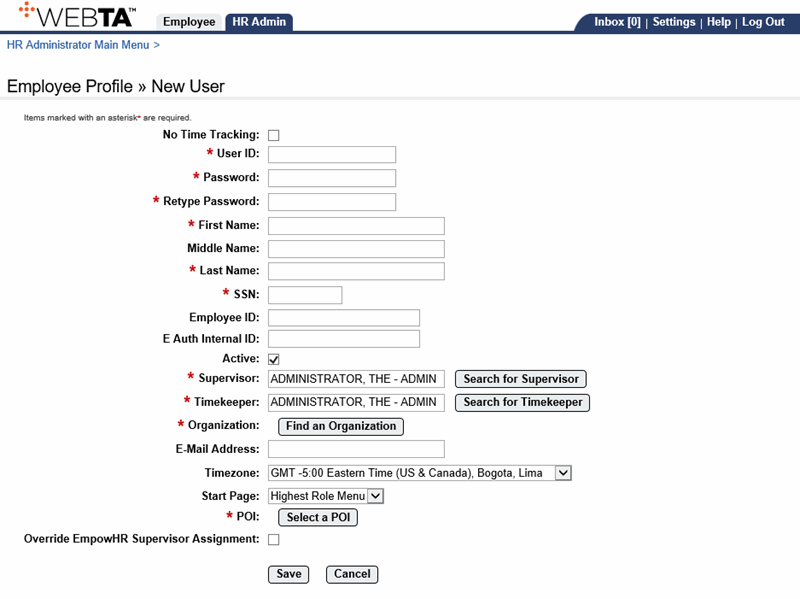
    Employee Profile - New User Page

  2. Complete the following fields:

    No Time Tracking

    User ID

    Password

    Retype Password

    First Name

    Middle Name

    Last Name

    SSN

    Employee ID

    E Auth Internal ID

    Active

    Supervisor

    Timekeeper

    Organization

    E-Mail Address

    Timezone

    Start Page

    POI

    Override EmpowHR Supervisor Assignment

  3. Select the Save button. The message Employee Profile Successfully Saved is displayed along with additional options in a sidebar menu.
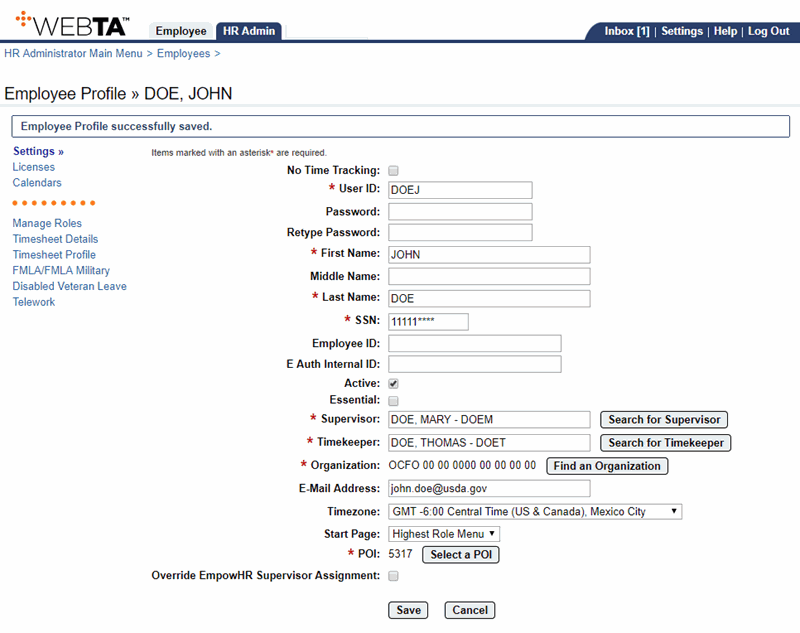
    Note: The Essential field is now displayed on the Employee Profile page. Check this box to designate if the employee is classified as essential under emergency conditions and select Save.

    Employee Profile Page - New User Added

  4. Select the Licenses link from the sidebar menu. The Licenses page is displayed with all available licenses selected.
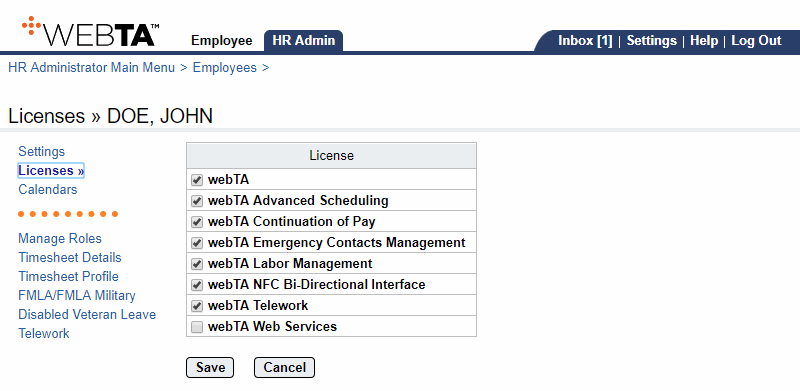
    Licenses Page

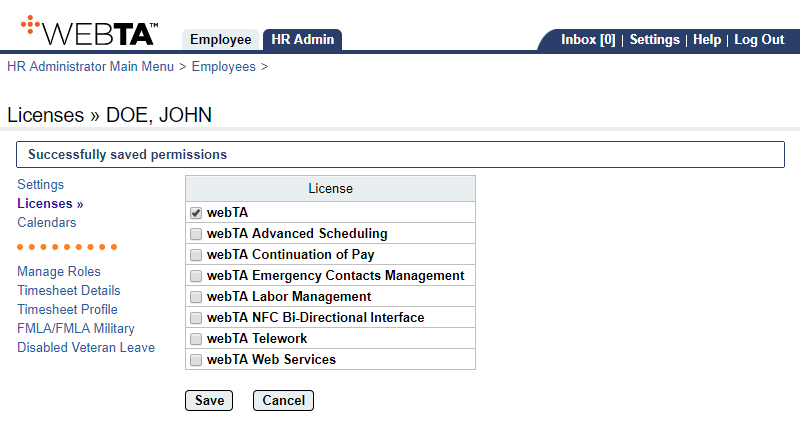
  5. Uncheck the boxes of the licenses that should not be assigned to the employee.
  6. Select the Save button. The message Successfully saved permissions is displayed.

    Licenses Page - Licenses Saved

    Note: The Calendars link has the US Federal Holiday Calendar selected. This allows for all Federal holidays to automatically populate to the timesheet. Unchecking this box would require employees to manually enter all Federal holidays.

  7. Select the Manage Roles link from the sidebar menu. The Role Assignments page is displayed.
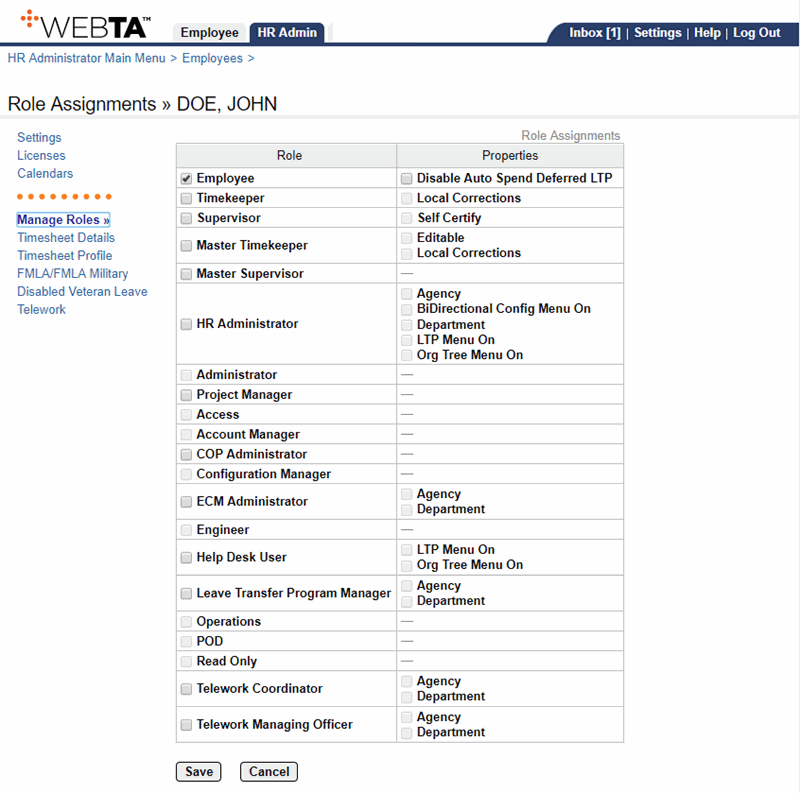
    Role Assignments Page

  8. Select the applicable roles to assign to the employee. For more information, see Roles.
  9. Select the Save button. The message Employee Profile successfully saved is displayed.
  10. Select the Timesheet Details link from the sidebar menu. The Timesheet Details page is displayed.
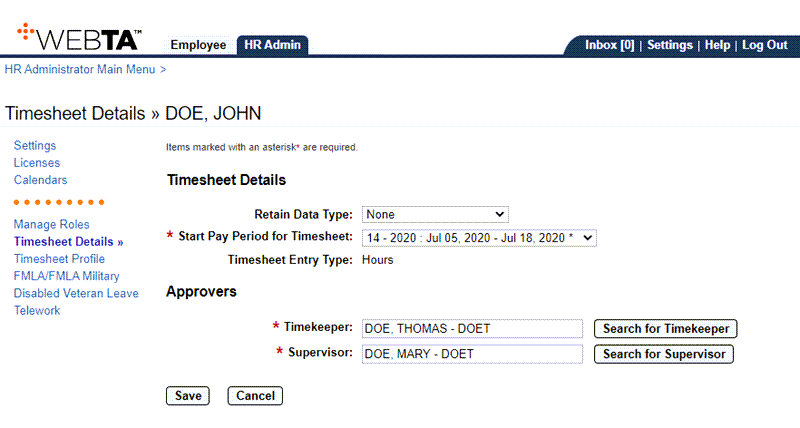
    Timesheet Details Page

  11. Select the applicable Retain Data Type. This will determine what data, if any, will populate to new timesheets. Valid values are:
    • None — New timesheets are blank.
    • Entries Only - No Times — Work entries (TCs and accounting) from the previous pay period's timesheet are copied into the employee's timesheet when the new pay period begins; hours are not carried over.
    • All — Work entries and hours from the previous pay period's timesheets are copied into the employee's timesheet when the new pay period begins.
    • Pay from Schedule — Work entries and hours from the schedule are copied into the employee's timesheet when the new pay period begins. If the employee's actual work or time entries differ from the schedule, the employee may edit the timesheet so that the actual work or time entries are recorded.
    • Exception Processing — This option applies only to hourly timesheets. Work entries and hours from the default schedule are copied into the timesheet when the new pay period begins. If the employee's actual work or leave time differs from the default schedule, they must record the change.
  12. Select the Save button. The message Employee Profile successfully saved is displayed.

    Note: The Timesheet Profile page must be completed by a timekeeper before a user can submit time in webTA.

  13. Select the Timesheet Profile link from the sidebar menu. The Timesheet Profile page is displayed.
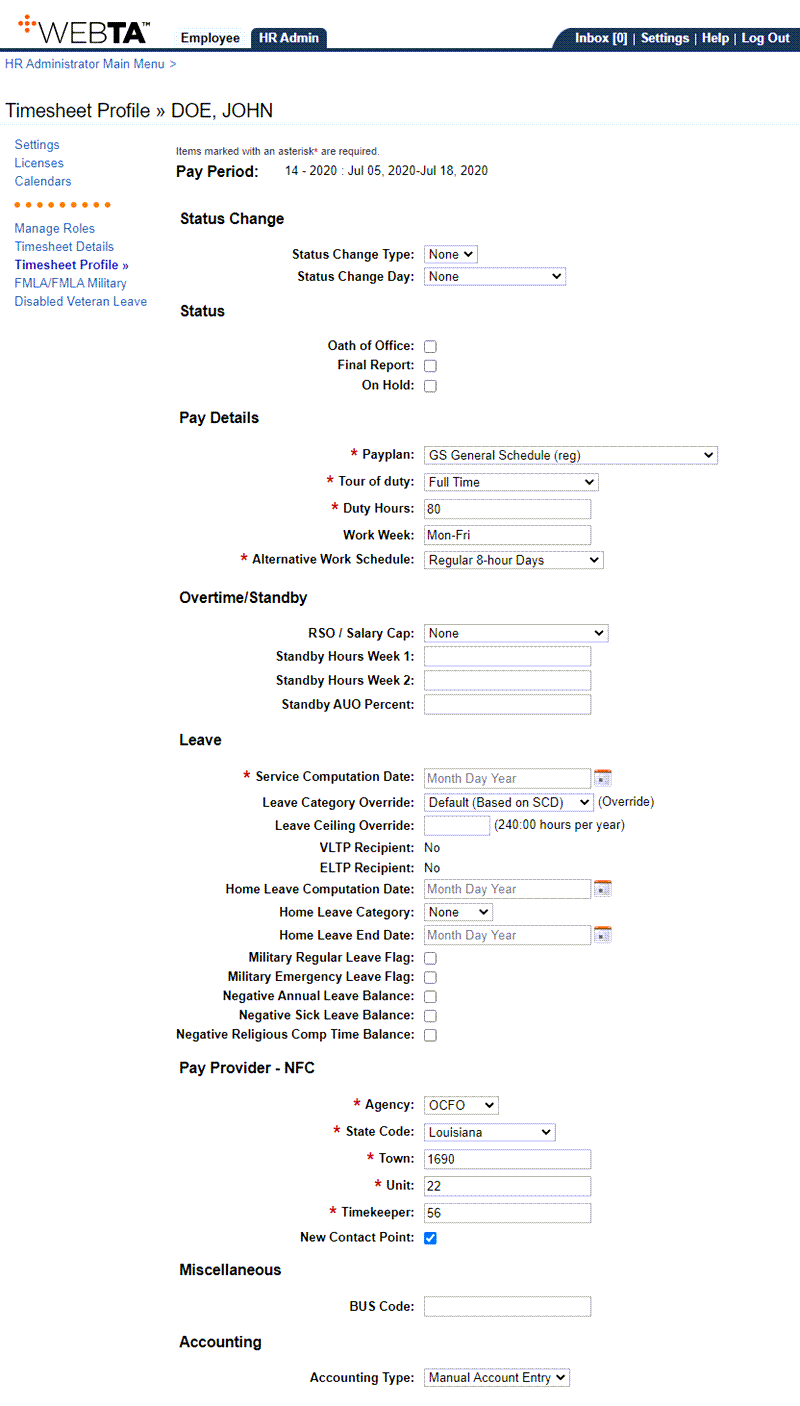
    Timesheet Profile Page

  14. Complete the following fields:

    Status Change Type

    Status Change Day

    Oath of Office

    Final Report

    On Hold

    Pay Plan

    Tour of Duty

    Duty Hours

    Work Week

    Alternative Work Schedule

    RSO/Salary Cap

    Standby Hours Week 1

    Standby Hours Week 2

    Standby AUO Percent

    Service Computation Date

    Leave Category Override

    Leave Ceiling Override

    VLTP Recipient

    ELTP Recipient

    Home Leave Computation Date

    Home Leave Category

    Home Leave End Date

    Military Regular Leave Flag

    Military Emergency Leave Flag

    Negative Annual Leave Balance

    Negative Sick Leave Balance

    Negative Religious Comp Time Balance

    Agency

    State Code

    Town

    Unit

    Timekeeper

    New Contact Point

    BUS Code

    Accounting Type

    Note: The remainder of the fields will be populated from the NFC daily feed file after the personnel action has applied. However, the POI field is pre-populated with the POI.

  15. Select the Save button. The message Timesheet profile saved is displayed.

    At this point, the following options are available:

    Step

    Description

    Select the Cancel button

    Returns you to the previous page.

    Select the HR Admin tab

    Returns you to the HR Administrator Main Menu page.

    Select Log Out

    Logs you out of webTA.

See Also

Latest Update Information

Accessibility for Users of Assistive Technology with webTA

Typographical Conventions

Feedback

Overview

Getting Started

HR Administrator

System Setup

Selecting Employees

Selecting Timesheets

Managing Delegates

Reassigning Employees

POI/Agency Assignment

Organization Management

Leave Transfer Program Management

Reports

Field Descriptions and Instructions