|
|
|
|
|
Adding a Payroll Office Information Record
The Add function allows users to add payroll office information records.
To Add a Payroll Office Information Record:
- Select the tab at the top of the CLER Main Menu.
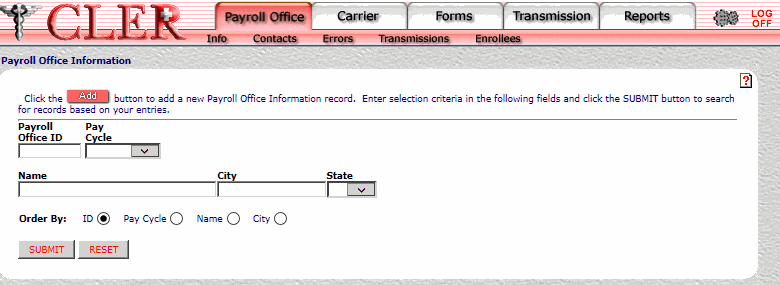
- Select the option. The Payroll Office Information page is displayed.
- Click . The Payroll Office Information Add page is displayed.
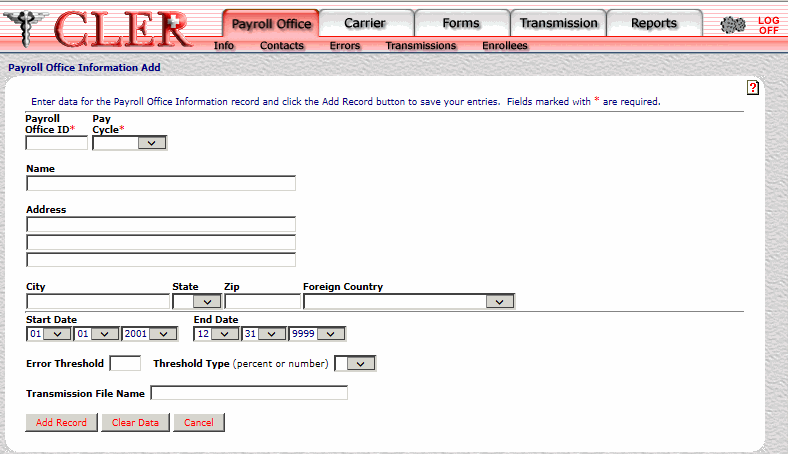
- Complete the fields as follows:
Field
Description/Instruction
Payroll Office ID*
Required
Enter the payroll office identification number.
Pay Cycle*
Required
Select the payroll office pay cycle from the drop-down menu. The values are , , .
Name
Optional, alphanumeric, 40 positions maximum
Enter the name of the payroll office.
Address Line 1
Optional, alphanumeric, 40 positions maximum
Enter the first line payroll office's street or post office box address.
Address Line 2
Optional, alphanumeric, 40 positions maximum
Enter the second line of the payroll office’s street or post office box address.
Address Line 3
Optional, alphanumeric, 40 positions maximum
Enter the third line of the payroll office’s street or post office box address.
City
Optional, alphanumeric, 25 positions maximum
Enter the name of the payroll office's city.
State
Optional
Select the payroll office’s State, U.S. territory, or overseas military abbreviation from the drop-down menu. For a list and descriptions of State, U.S. territory, and overseas military abbreviations, see State, U.S. Territory, and Overseas Military Abbreviations Table.
ZIP
Optional, alphanumeric, 11 positions maximum
Enter the payroll office’s ZIP Code.
Foreign Country
Optional
Select the payroll office contact’s country code from the drop-down menu. For a list and descriptions of country codes, see Country Codes Table.
Start Date
Optional
Select the Start Date the payroll office will be valid. Click the first drop-down menu and select the month; click the second drop-down menu and select the day; and click the third drop-down menu and select the year. If the date is not known, select 01/01/2001.
End Date
Optional
Select the End Date (the last date the payroll office will be valid). Click the first drop-down menu and select the month; click the second drop-down menu and select the day; and click the third drop-down menu and select the year. If the date is not known, select 12/31/9999.
Error Threshold
Optional, numeric, 3 positions maximum
Enter the number or percentage of errors permitted for the payroll office/carrier before a transmission file is rejected.
Threshold Type
Optional
Select the Error Threshold code from the drop-down menu. Select for percent and for number.
Transmission File Name
Optional. alphanumeric, 40 positions maximum
Enter the name of the quarterly transmission file sent by the payroll office.
- Click . If no errors occur, a pop up message is displayed to confirm the record has been added.
- Click to close the pop up.
See Also |