|
|
|
|
|
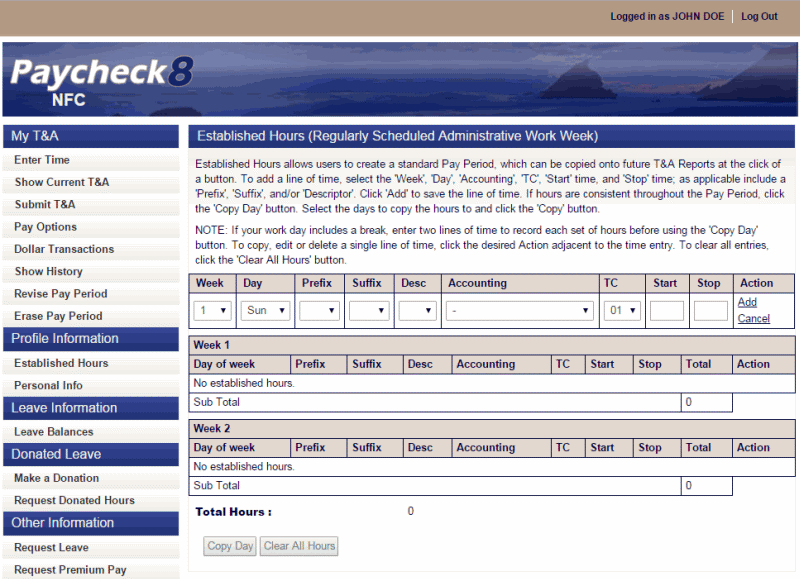
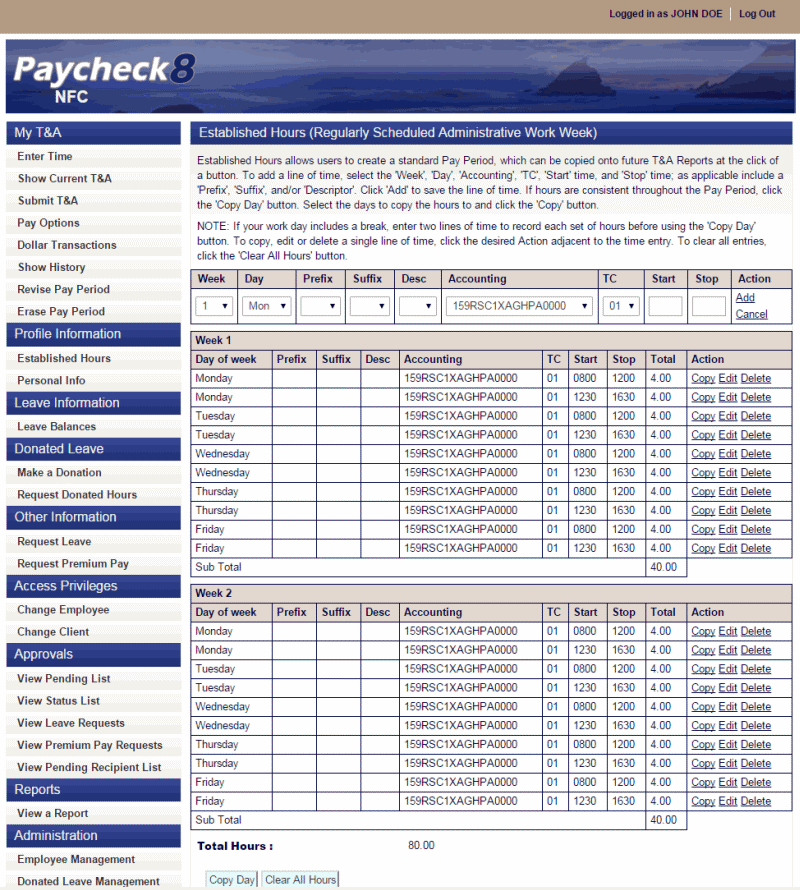
Establishing Default Hours
allows users the ability to establish a standard two-week pay period, which can be copied onto future T&As.
To use this feature, for each day you must indicate the Week, Day, Accounting, TC, Start, Stop, and, if applicable, a Prefix, Suffix, and/or Descriptor.
To Create Established Hours:
- Select from the Profile Information menu on the Paycheck8 main menu page. The Established Hours (Regularly Scheduled Administrative Work Week) page is displayed.
- Complete the fields as follows:
Field
Instruction
Week
Select the applicable week from the drop-down list.
Day
Select the beginning day of your work week from the drop-down list.
Prefix
Select a transaction code prefix from the drop-down list, if applicable.
Suffix
Select a transaction code suffix from the drop-down list, if applicable.
Desc
Select a transaction code descriptor from the drop-down list, if applicable.
Accounting
Select the required accounting code from the drop-down list.
Select the applicable transaction code from the drop-down list.
Start
Enter the four-digit start time. The start time can range from to and must be at least 15 minutes prior to the associated stop time. Time must be entered in a minimum of quarter hours; the last two positions must be , , , or .
Stop
Enter the four-digit stop time. The stop time can range from to and must be at least 15 minutes after the associated start time. Time must be entered in a minimum of quarter hours; the last two positions must be , , , or .
- Click . The first line of time entered is displayed.
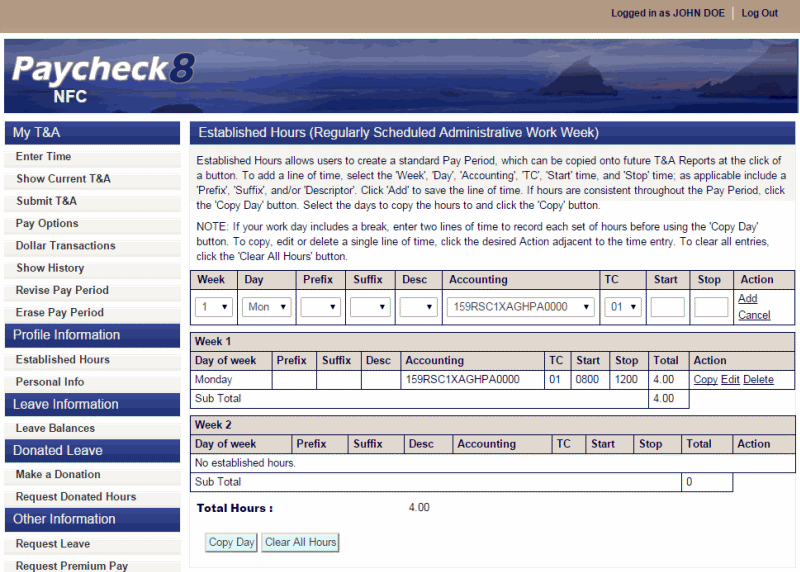
- Repeat Steps 2 and 3 above until the first day is complete.
- Click to copy only the specific line to other defined days of the week within the pay period.
OR
Click to copy established hours to other defined days of the week within the pay period.
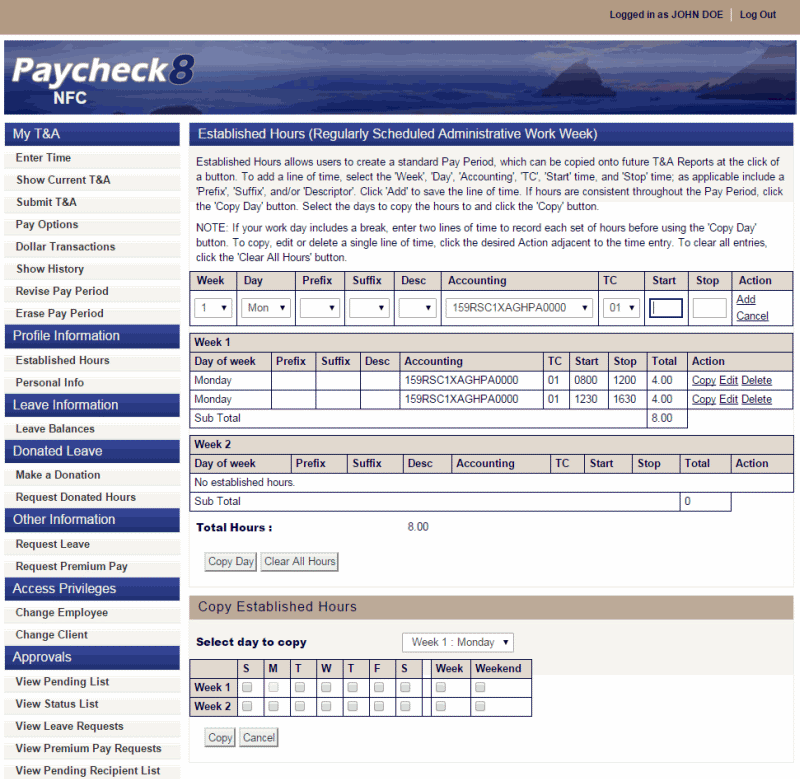
- Check the boxes for the specific days to copy the established hours.
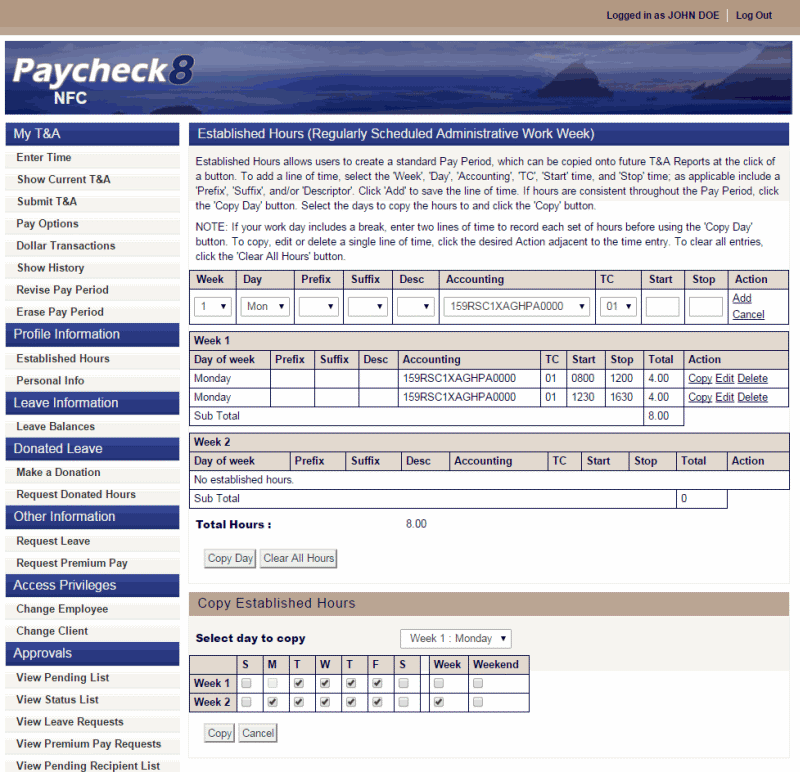
- Click . The Established Hours page displays the hours copied.
- Review the table to ensure the hours established are correct.
See Also |