Job Codes and Positions
This section contains the steps and tabs used to process job code and position transactions through the EmpowHR Excel CI utility.
Coversheet Tabs
There are Coversheet tabs in the CI utility workbook (for job code and position). The Coversheet tabs explain how to execute business logic for each transaction (Job Code and Position). To access these tabs and complete the applicable transaction follow the steps below:
- Access the CI utility on the EmpowHR Web site at .
- Select the link at the top of the page.
- Under , click the link to download the Job Code workbook template. This template will be used to create or update fields on the job code. The Job Code Data coversheet is displayed.
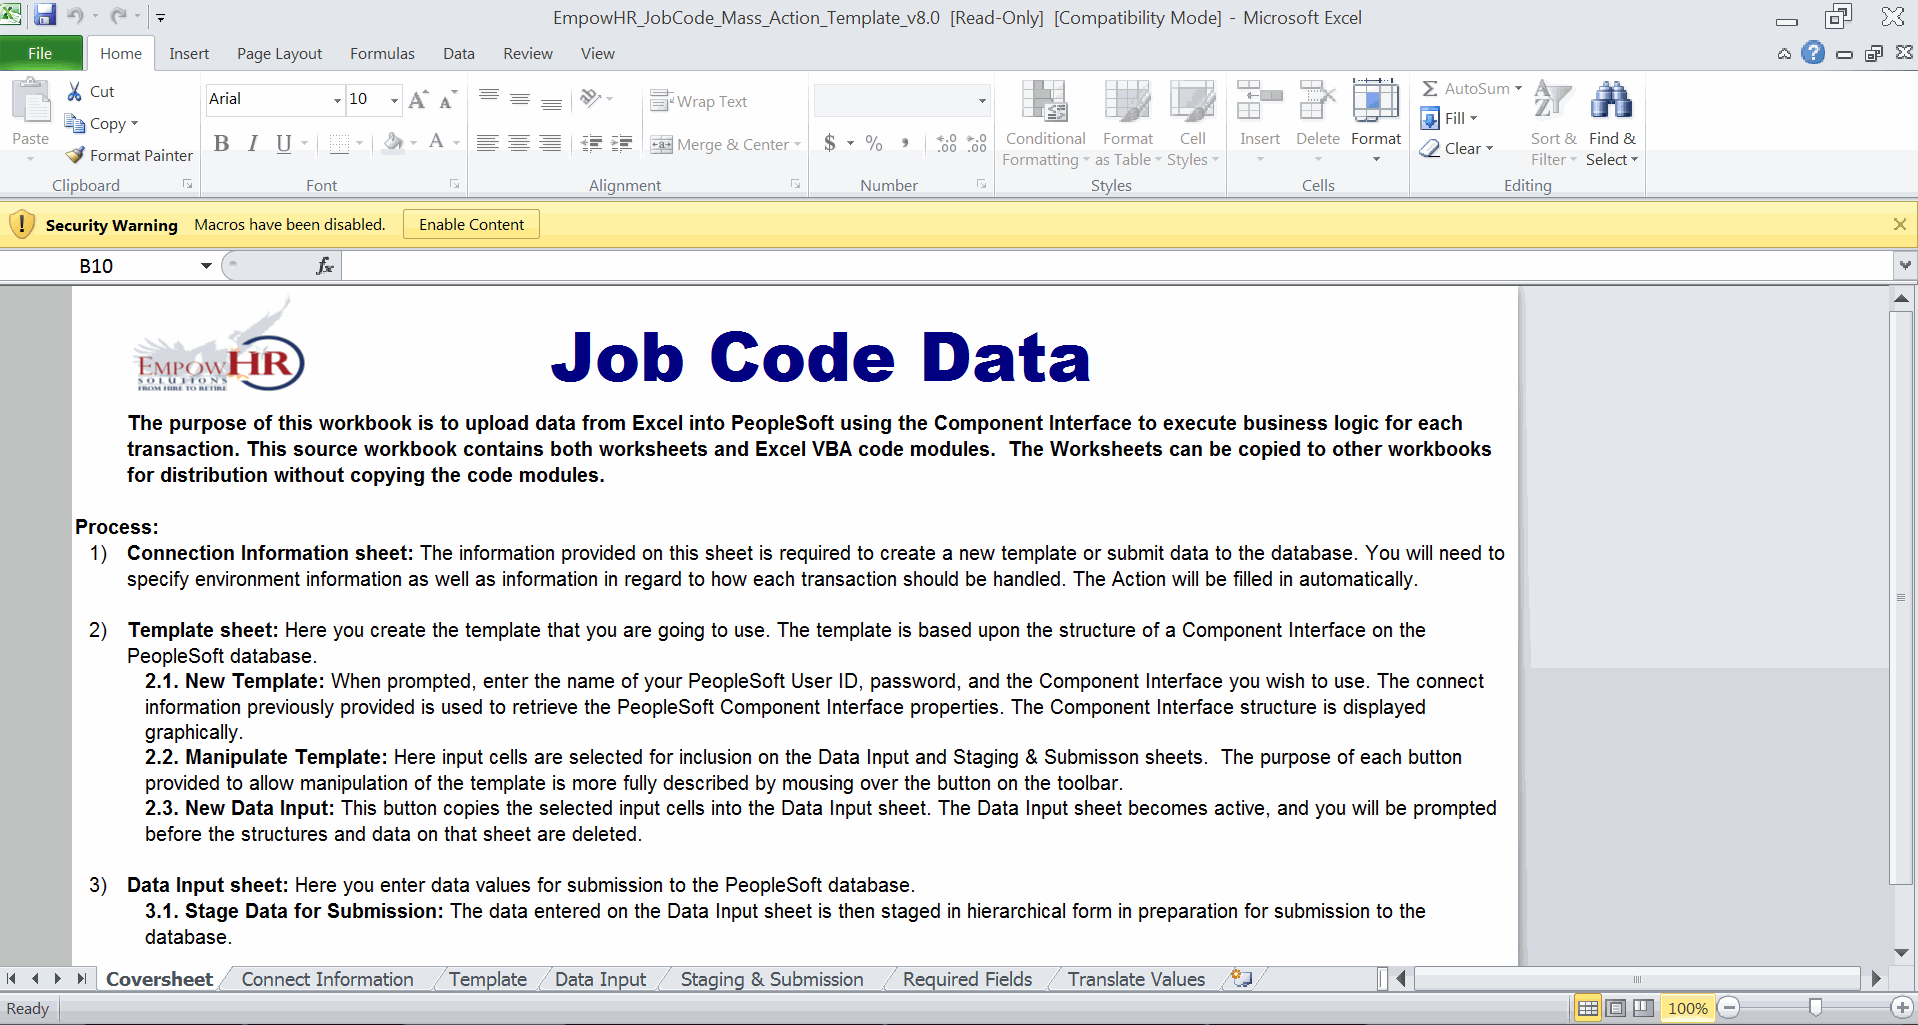
OR
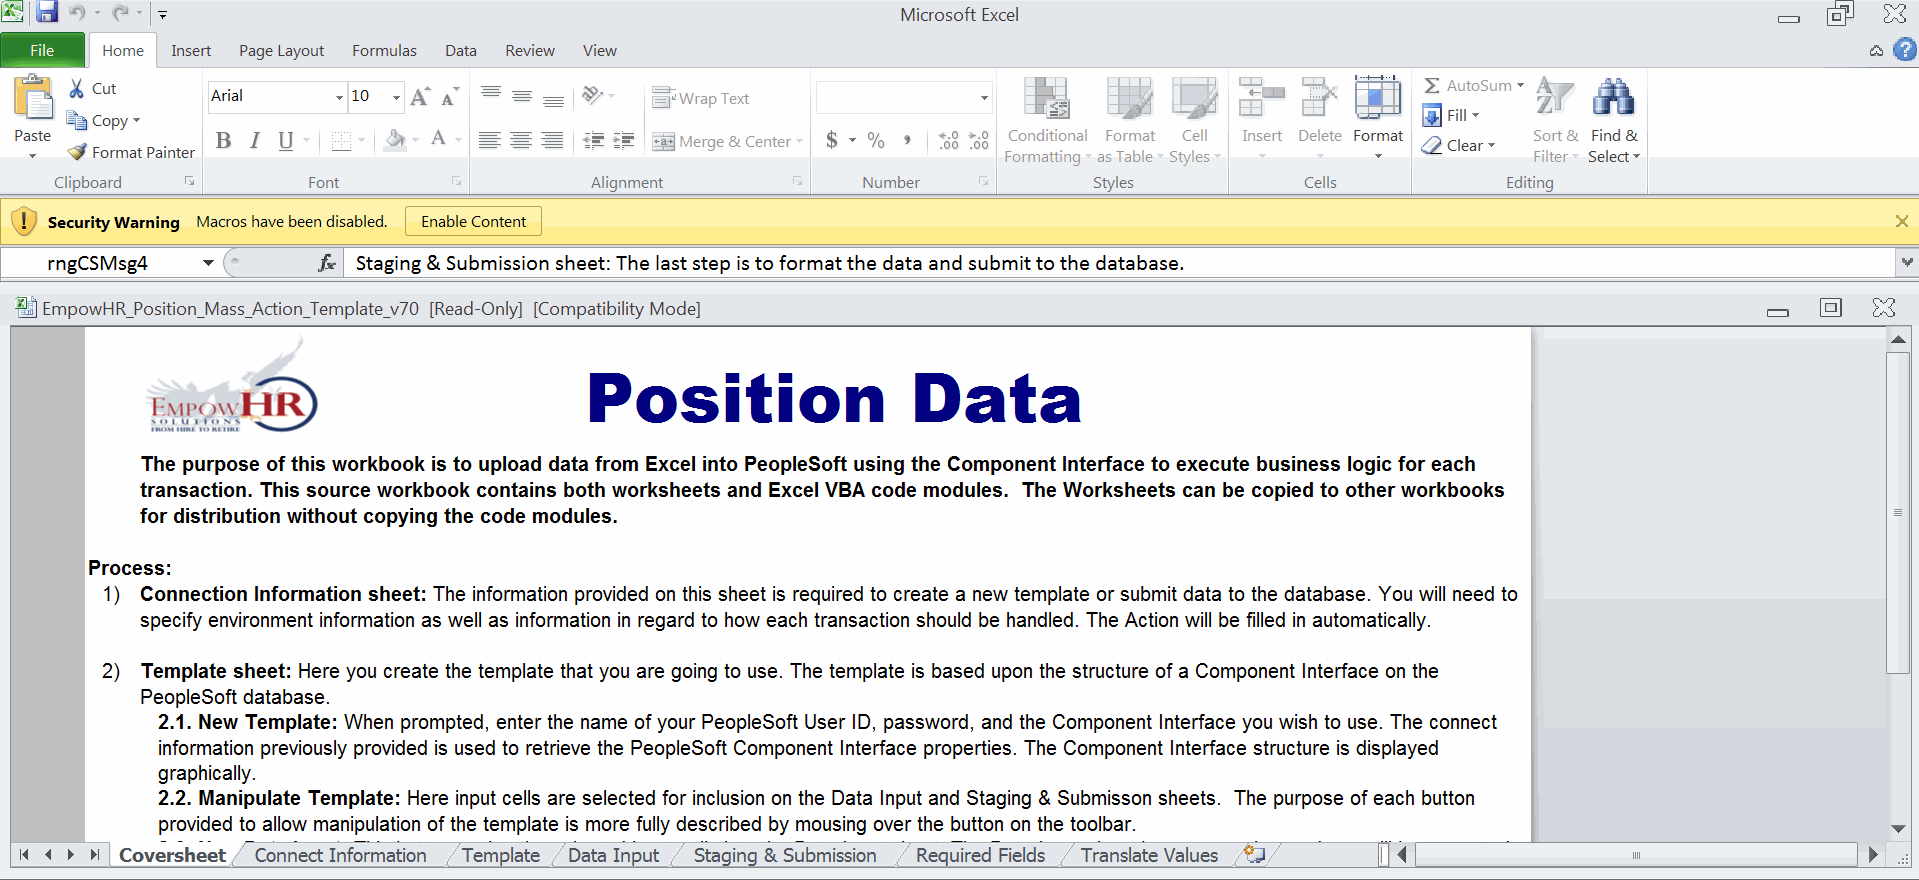
Click the link to download the Position Data workbook template. This template is used to create or update fields on the position. The Position Data coversheet is displayed.
Connect Information Tabs
Connect Information is a tab on the Excel worksheet. To access the Connect Information tab, follow the steps below.
- Select the tab. The applicable Connect Information worksheet for the Job Code or the Position is displayed.
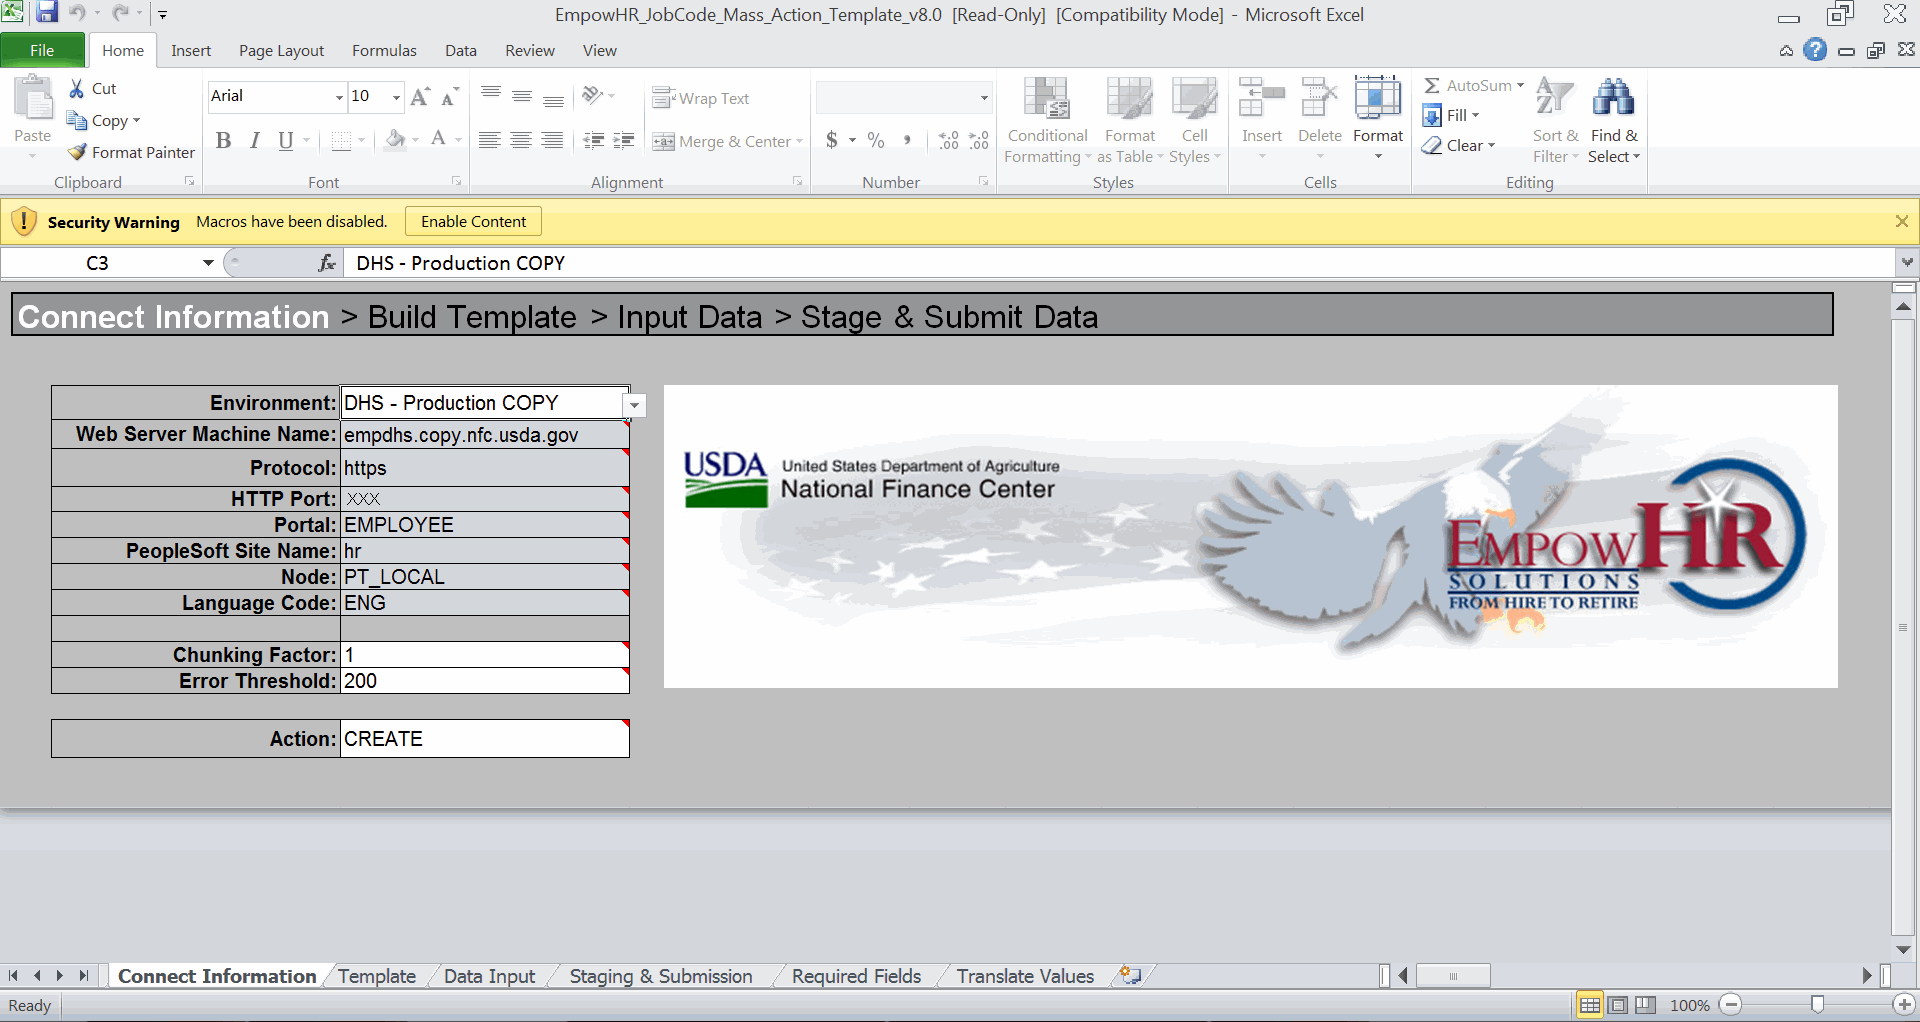
- Complete the fields as follows:
Field
Description/Instruction
Environment
Select the applicable environment. The valid values are as follows:
- United States Department of Agriculture (USDA) environment that mirror images production. This environment does not modify the production database.
- environment where processing of data takes place to add, modify, or delete information in EmpowHR.
- Department of Homeland Security (DHS) environment that mirror images production. This environment does not modify the production database.
- environment where processing of data takes place to add, modify, or delete information in EmpowHR.
- User Acceptance Testing (UAT) environment used to test modifications before moving the modification to the production environment.
- environment used to test modifications before moving the modification to the production environment.
- human resources (HR) USDA QA environment used to test functionality.
- DHS QA environment used to test functionality.
- HR test environment.
- environment used by DHS to test functionality.
- environment used to train EmpowHR users.
- environment used to develop EmpowHR functionality.
Web Server Machine Name
Field populated with the EmpowHR Web server. The server name will be different depending on the environment.
Protocol
Access used for the Web server. The field is populated and cannot be changed.
HTTP Port
The number used by the Web server. The field is populated and cannot be changed.
Portal
The portal used. The field is populated and cannot be changed.
PeopleSoft Site Name
The environment used in the component interface. This field is based on the Environment and template type selected. The field is populated and cannot be changed.
Node
Field defaults to the local node name. The field is populated and cannot be changed.
Language Code
Code populated with and cannot be changed.
Chunking Factor
The number of rows of data submitted to the database at one time
(1 collection of 10). The field can be changed.Error Threshold
The total number of errors that are permitted before submission to the database ceases. When the error threshold is exceeded, an error message appears on the Staging & Submission Results tab.
Action
Select an action from the drop-down list. This field is required. The type of action performed is determined by the selection in this field. Valid values are (creates new positions or job codes) and (uses an existing position or job code and adds a new record to update the data).
- Click the applicable tab. The Template tab for the Job Code or Position is displayed. For more information on the Template tabs, refer to Templates in this procedure.
Templates
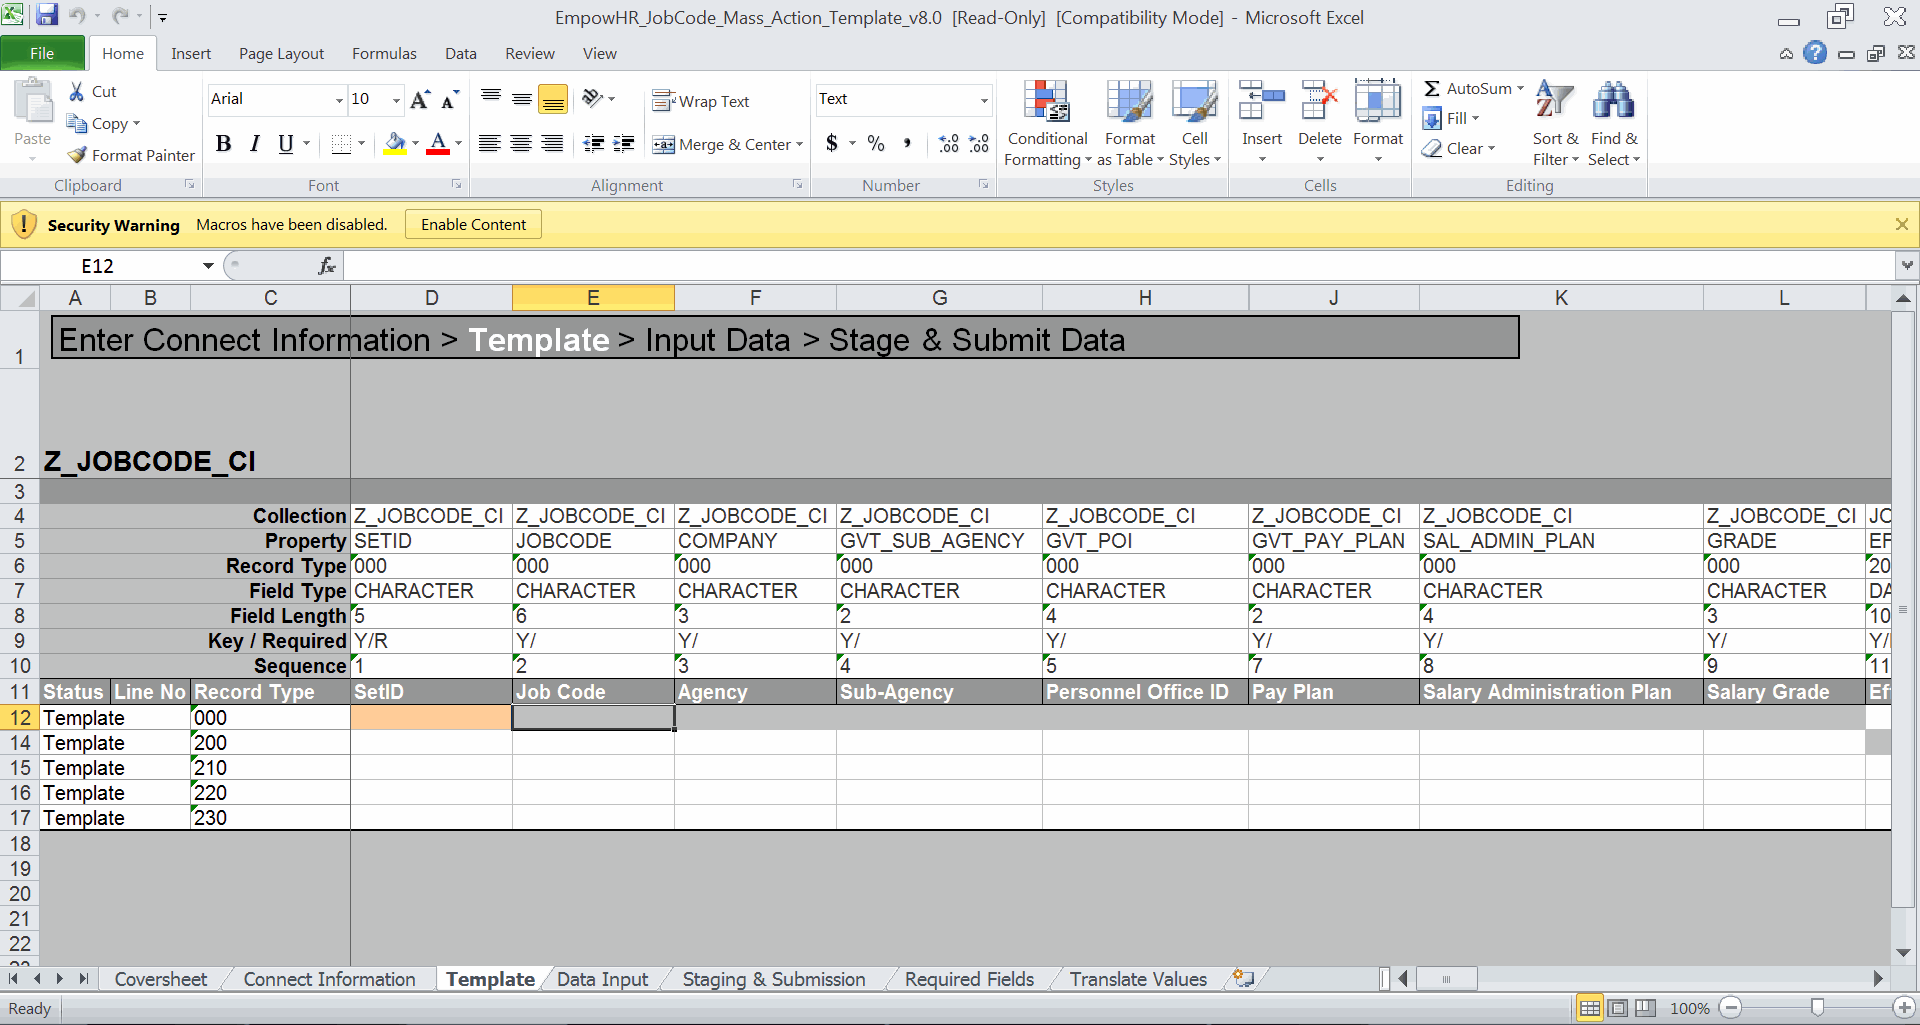
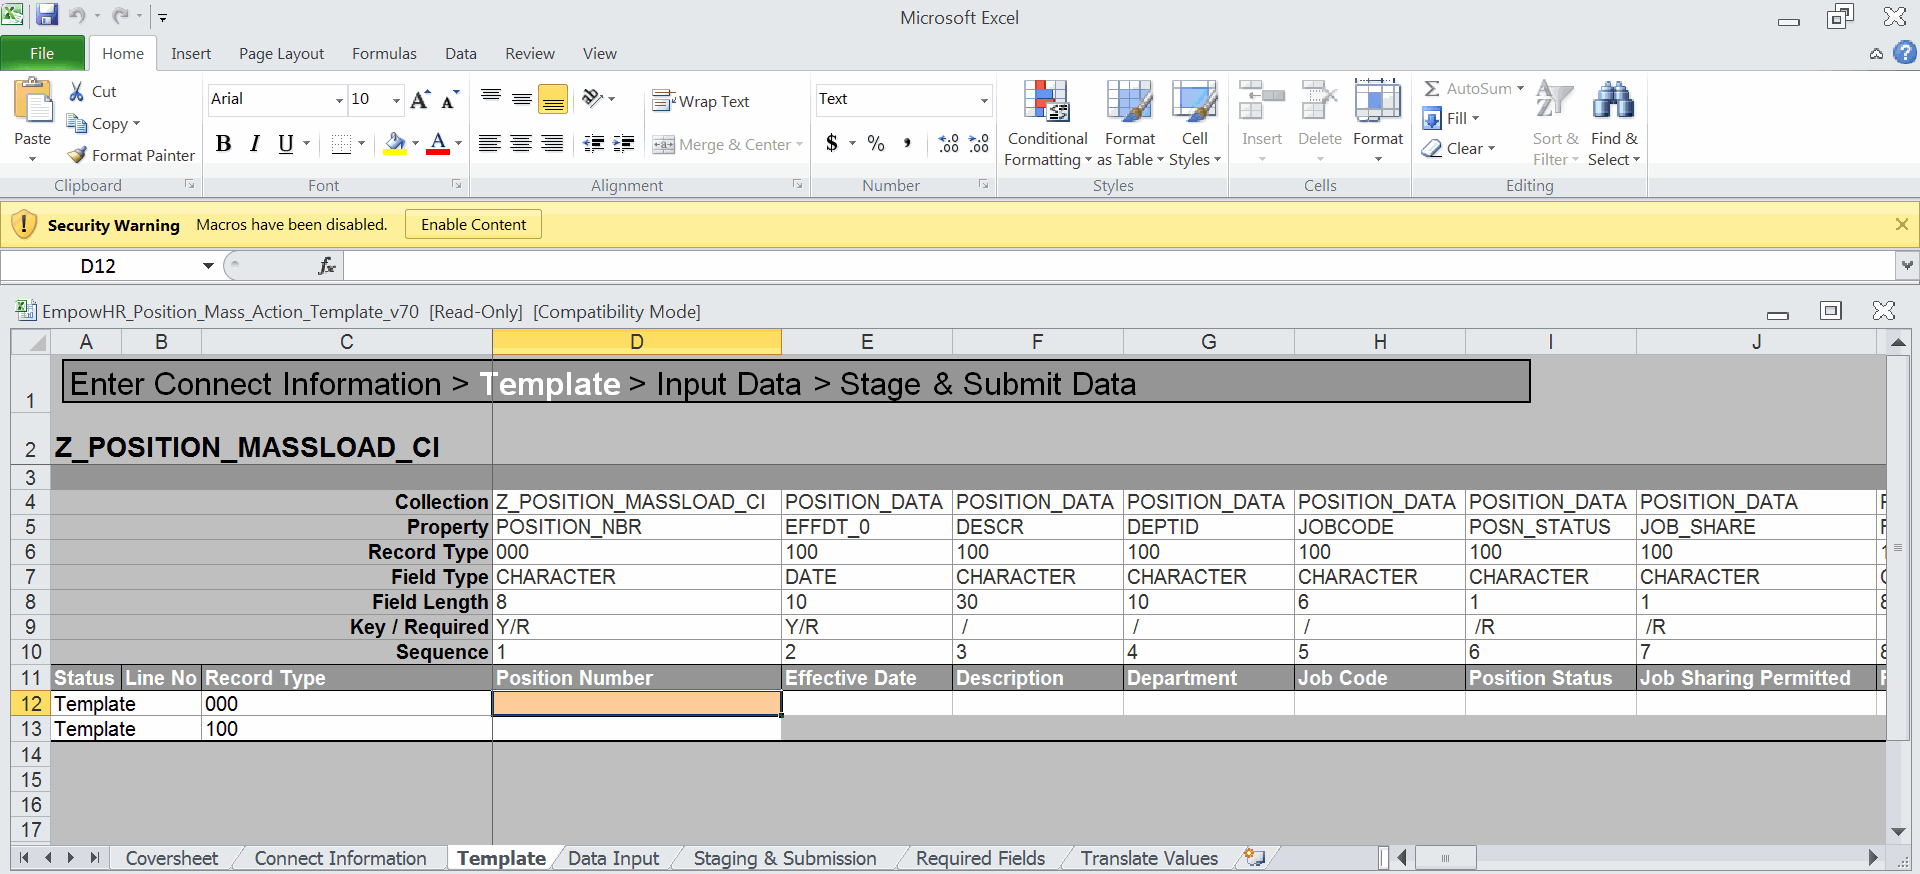
The Templates tab is a graphical representation of the CI structure that will be used to load data into EmpowHR. Templates for each type of component in EmpowHR are populated with the fields that may be updated in EmpowHR. The template is used to build the structure for the data that will be sent to EmpowHR. In this workbook, you will select fields used for transmission, omit fields, and enter any default or common values. For a list of mandatory fields, refer to the Required Fields tab for the Job Code or Position. For a list of translate values, refer to the Translate tab for the Job Code tab or for the Position.
The data on the top of the workbook contains database details of the fields on the EmpowHR page.
The header row displays the field label visible within EmpowHR.
The Record Type fields represent the child and parent record levels within EmpowHR.
The fields that are open at the Record Type 000 are key search fields. These fields are required when creating a new record. When updating a record, it is important to complete some of these fields to ensure that the correct record is being updated.
Use the Required Fields worksheet to ensure that all required fields (for the applicable action type) are selected on the Template worksheet.
- Select the applicable Template tab (the Job Code template or the Position template). The Template tab has a tool bar at the top.
- Click on the top menu bar to display a custom toolbar for the worksheet. The options available on this toolbar are used to build the template. Each tool bar option has help text that describes the purpose and use of each of the options when the cursor is placed over the option. Below is a description for each tool bar option.
Tool Bar Options
Description
New Data Input
Builds a new Data Input worksheet based upon the selected input cells. This option is used-once the template is built-to begin data entry. This will erase any structure or data previously entered on the Data Input tab; therefore, it is recommended that the template is completed before entering data.
Select Input Cell
Selects an individual cell to be updated on the Template worksheet. This is used for a list of values that are different from one row to the next (e.g., job code, position). Cells selected as input cells are highlighted. All cells highlighted on the template worksheet will appear on the Data Input worksheet. This option will make the highlighted cell available for data entry on the Data Input tab.
Deselect Input Cell
Changes a cell that was previously selected as an input cell to a cell that is included on the Staging & Submission tab. The cell is no longer included on the Data Input worksheet, but appears as part of the structure on the Staging & Submission worksheet. This option will remove a previously-selected cell from the Data Input tab. This cell will still display on the Staging & Submission worksheet.
Restore Input Cells
Restores the Templates worksheet to its original state and clears default values. The fields in the template will be shaded, indicating that these fields will not be included for the Staging &Submission tab. This option restores the Template worksheet to the default values. It is recommended that this is selected to refresh the template before creating a new template.
Include for Submission
Includes a single Property to be included on the Staging & Submission worksheet. Properties that use default values from the Templates worksheet must be included for submission. This is used when the value is not changing between rows on the spreadsheet (i.e., set identification (ID) or effective date). Cells that are included for submission generally are properties that contain default values or properties that could be seen in the structure of the Staging & Submission worksheet. Properties that are included for submission are highlighted.
This option selects the highlighted cell to display on the Staging & Submission worksheet. This option does not select these cells for data input on the Data Input worksheet. This is generally used when the user wants certain default values to apply to all data input records (e.g., Agency, SubAgency, POI, etc.).
If you are adding a default value:
- Select the cell
- Click
- Enter the default value in the cell
Do Not Include for Submission
Does not include the selected property for submission to the database. If a property is not included for submission, it will not appear in the structure that is submitted to the database on the Staging & Submission worksheet. Properties that are not included for submission will only appear on the Template worksheet and not submitted to the database. Properties that are not included for submission are shaded.
This option removes a previously selected cell from the Staging & Submission worksheet. This option also removes the cell from the Data Input worksheet.
The rows 4-10 on top of the Excel worksheet are populated and protected. These fields can only be updated by NFC and are different based on the environment (UAT, Copy, Production) and the template type (Job Code and Position.)
Below are the fields for the Position and the description of each:
Field
Description
Collection
Job Code or Position Data - Template Type.
Property
Field names that may be updated on the Position.
Record Type
Type generated from the Template worksheet.
Field Type
Alpha/numeric character or date of the Property.
Field Length
Length of the field.
Key/Required
Key field or a required field.
Sequence
Sequential number of the column.
- Select the tab once the template is built. For more information regarding Data Input, refer to the Data Input section in this manual.
Data Input
The field labels that appear on the data input sheet are those properties that were selected as input cells on the Template worksheets. The Record Type from the Template worksheet is also displayed for each Property.
The Data Input sheet is also used to correct data to submit to the database. Errors that are flagged on the Staging & Submission Results worksheet are posted to the Data Input worksheet; and when corrected, the items marked in error can be staged again on the Staging & Submission worksheet (for the Job Code or the Position).
The Data Input worksheet is used to enter data that will be submitted to EmpowHR with the fields that are modified. The Data Input Job Code tab or the Data Input Position tab displays only required fields to update.
The same record-type structure that is on the Template worksheet is displayed on the Data Input worksheet.
The fields listed as a Record Type 000 are key search fields. For updates, these fields are used to locate the record to be updated.
Select the Staging & Submission tab for the Job Code or Position. This will open the final worksheet in the Excel workbook.
Staging and Submission
This tab is where the Excel CI workbook reformats the data entered on the Data Input worksheets so that EmpowHR can update the record. The Staging & Submission worksheet displays all of the fields and data from the Data Input worksheet (and those selected for Submission Only). These fields have the same Record Type structure as the fields on the Template and Data Input worksheets. You must verify that the populated data fields are the same as the Data Input worksheets.
- Select the Staging & Submission tab. The Staging & Submission worksheet for the Job Code or Position is displayed. The custom toolbar is also available on this worksheet.
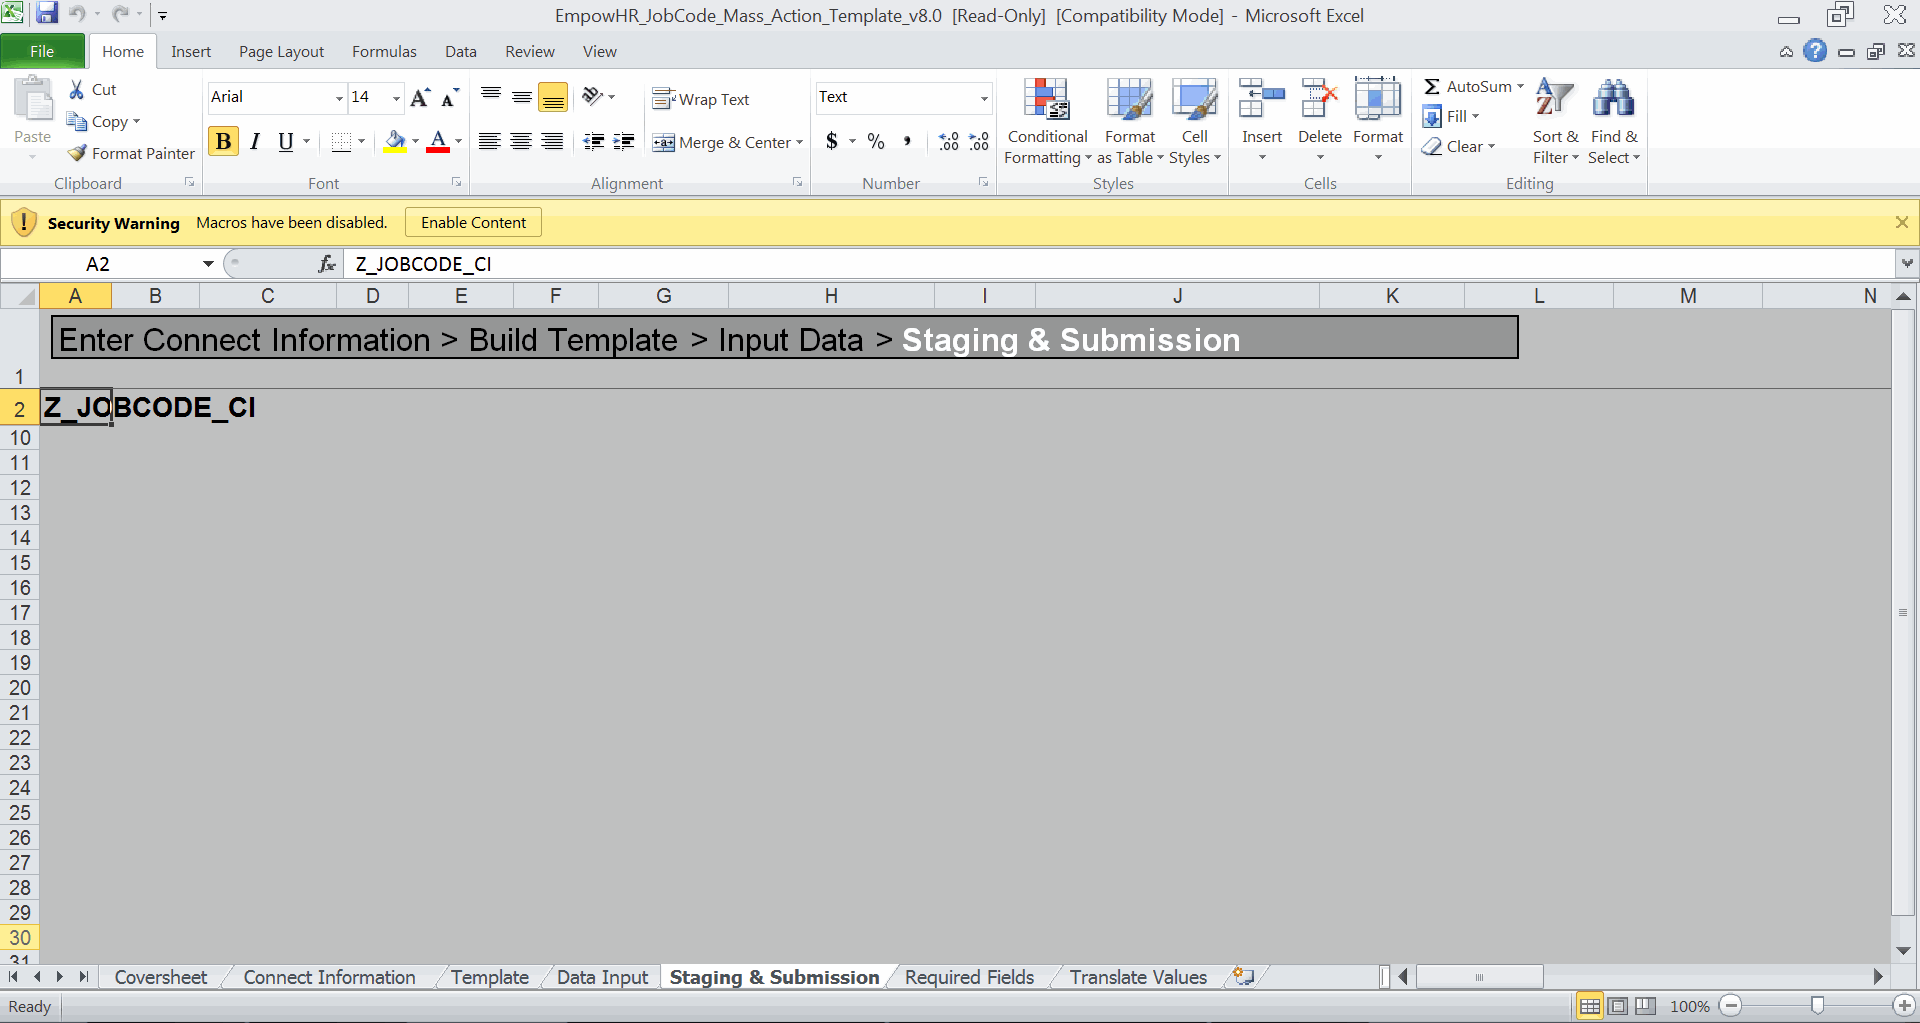
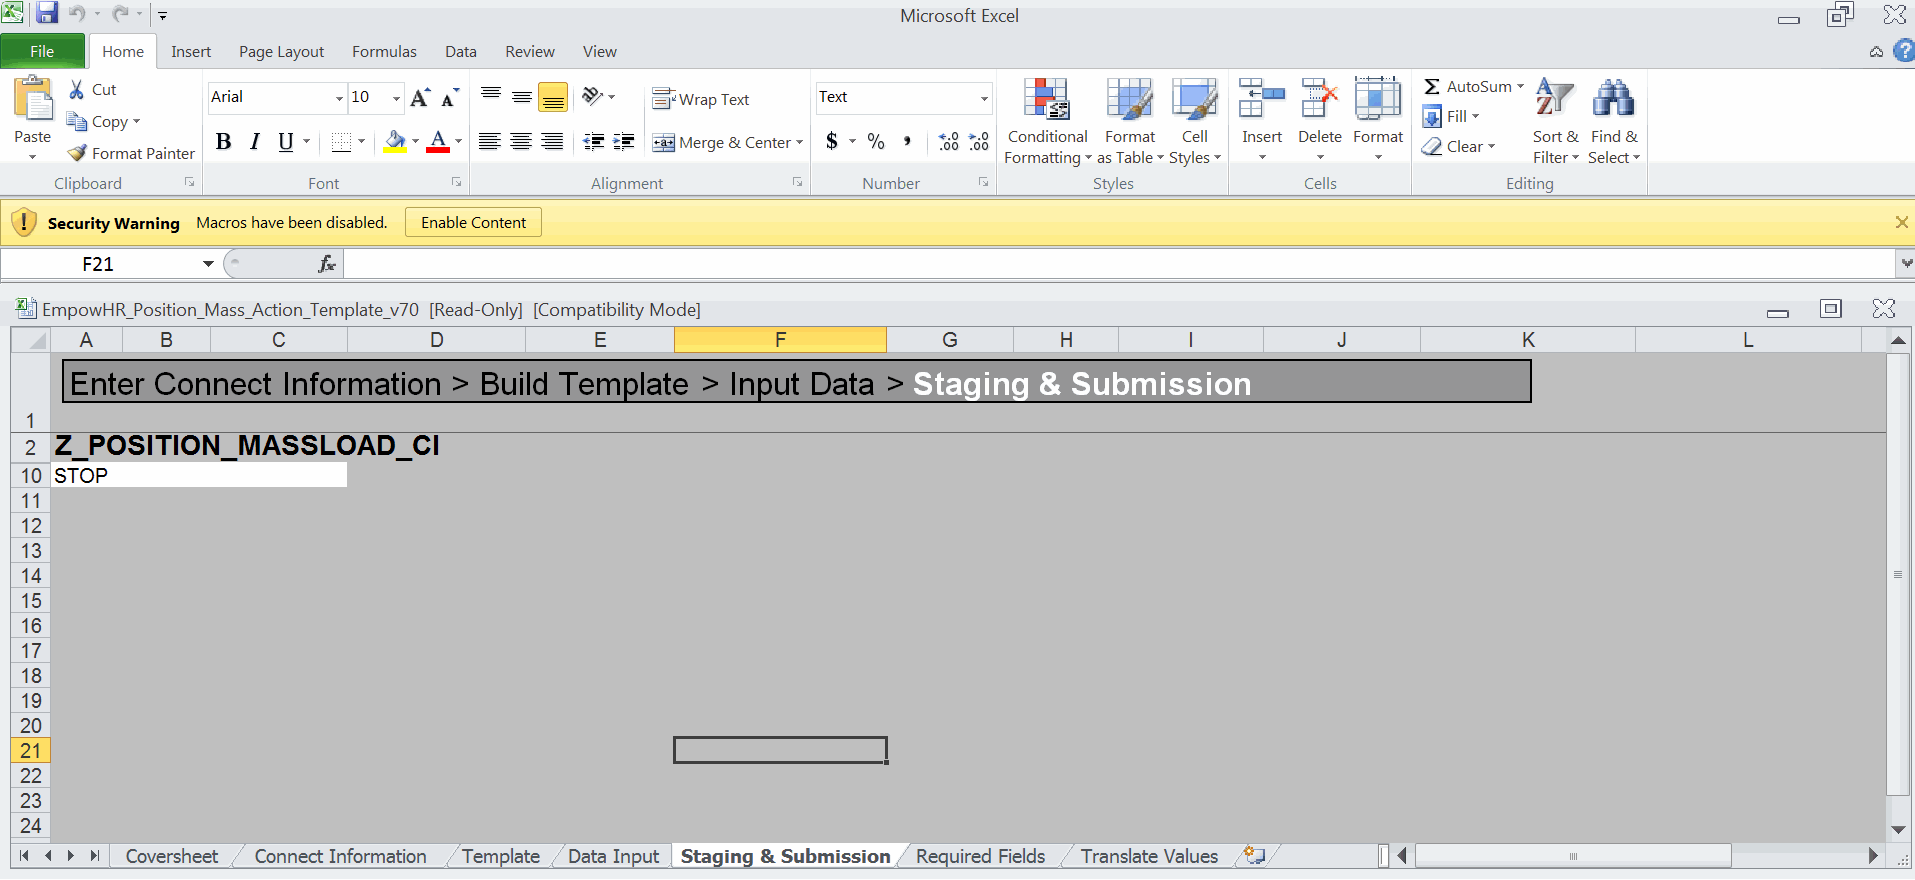
- Click at the top of the worksheet. For definitions of the options, see Templates.
- Select . The Login popup appears.
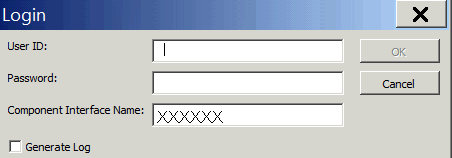
- Complete the fields as follows:
Field
Description/Instruction
User ID
Enter the EmpowHR user ID assigned.
Password
Enter your specific EmpowHR password.
Component Interface Name
Populated based on the Environment selected from the NFC Home Page. The valid Environments are , , and .
Generate Log
Box that can be changed. This checked box is used to create one log file for ExcelToCI.xls and for the SOAPTOCIWeb Library. These files are used for troubleshooting.
- Click . The utility submits the data to the EmpowHR database. If there are no errors, displays in the Status column on the Staging & Submissions results tab.
If there are errors on this page, the Status field will contain a red box with the word . Move the mouse over the red box to reveal the error(s) that were encountered during the submission. A may display during submission. The warning information can be viewed online. This is a rare occurrence.
- To view the results of the utility on one page, select . The results of the submission are copied to the Data Input worksheet to view the status of each row and make any necessary corrections to rows that have the status of .
- To view the updates that are , log into EmpowHR to view the applicable modified data.
To validate results:
Once results have been posted to the Excel CI utility, you can view the status for each transaction. After the batch process runs, you can validate the results. For any rows that have been successfully updated, you can navigate to the record in EmpowHR and validate the changes. Results reflecting an status can be verified in EmpowHR by navigating to the employee’s record via the applicable Job Code or Position Information page. When the row is added, the record will reflect status.
Results reflecting an status can be viewed in EmpowHR by navigating to and running a query. The query will contain each data record that could not be applied and its error message(s). These records need to be corrected and resubmitted in the EmpowHR Excel CI utility.
Required Fields
The Required Fields tab displays mandatory fields and values needed for each type of transaction (Job Code and Position). The Required Fields tab for the Job Code will become available when the Data Template Type for the Job Code is selected. The Required Fields tab for the Position will become available when the Template Type for the Position is selected.
Translate Values
The Translate Values tab displays the translate values needed for each type of transaction (Job Code and Position). The Translate Values for the Job Code will become available when the Template Type for the Job Code is selected. The Translate Values tab for the Position will become available when the Template Type for the Position is selected.
See Also |