Advanced Schedules
Advanced schedules allow Employees to utilize features, such as scheduling regular days off and setting temporary schedules. Employees are allowed to add and submit advanced schedules. Advanced schedules must be approved or denied by a Supervisor. Advanced schedules may be set as permanent or temporary. A permanent schedule is an Employee's regular day-to-day schedule. A temporary schedule could be set for an Employee for a specific length of time with a beginning and ending date. With either schedule, the total hours must match the duty hours in the Employee's timesheet profile. webTA applies the permanent schedule every pay period unless a temporary schedule has been submitted and approved. When the approved temporary schedule ends, webTA automatically reverts back to the permanent schedule.
The End Date for a Permanent Advanced Schedule defaults to once the shifts are added. As a result of this, it is advised to always enter an end date. This will allow for future changes to a Permanent Advanced Schedule.
To Add a Permanent Schedule:
A schedule may either be a predefined schedule or a manually created schedule. Once these schedules are added, you may modify the schedule(s).
- Select the link from the Schedule section on the Employee Main Menu page. The Schedule Assignment page is displayed.
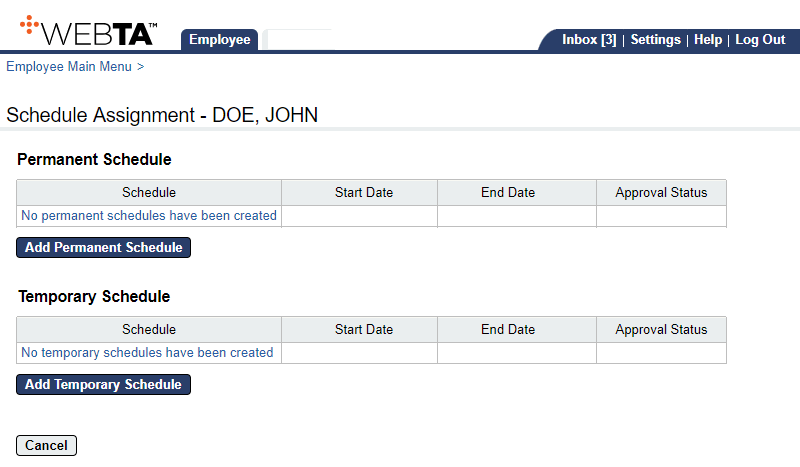
- Select the button. The (Add) Schedule page is displayed.
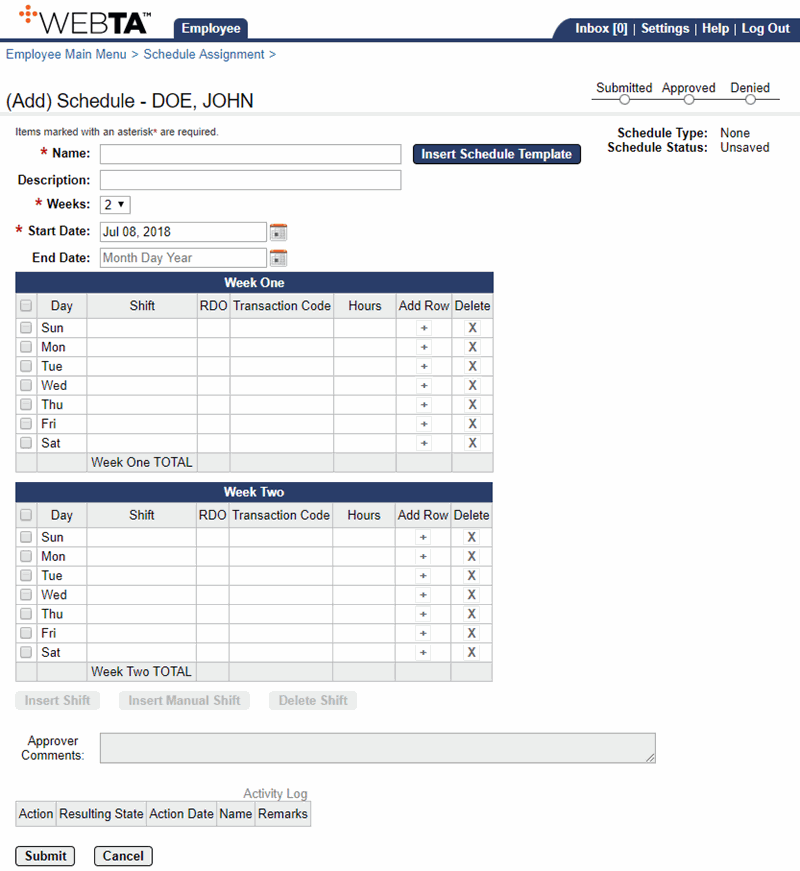
- Complete the following fields:
- Select the applicable day(s) for the schedule being added. The , , and buttons are activated above the Approver Comments box.
- Select the button to add a predefined shift. The Select Shift page is displayed.
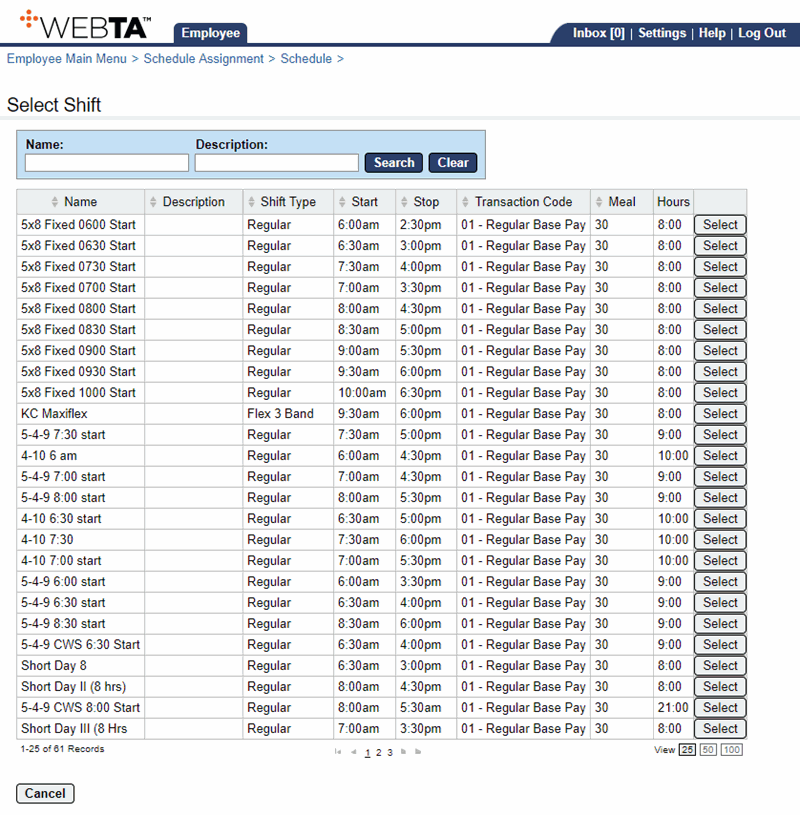
- Select the applicable shift to insert. The shift displays on the day(s) selected.
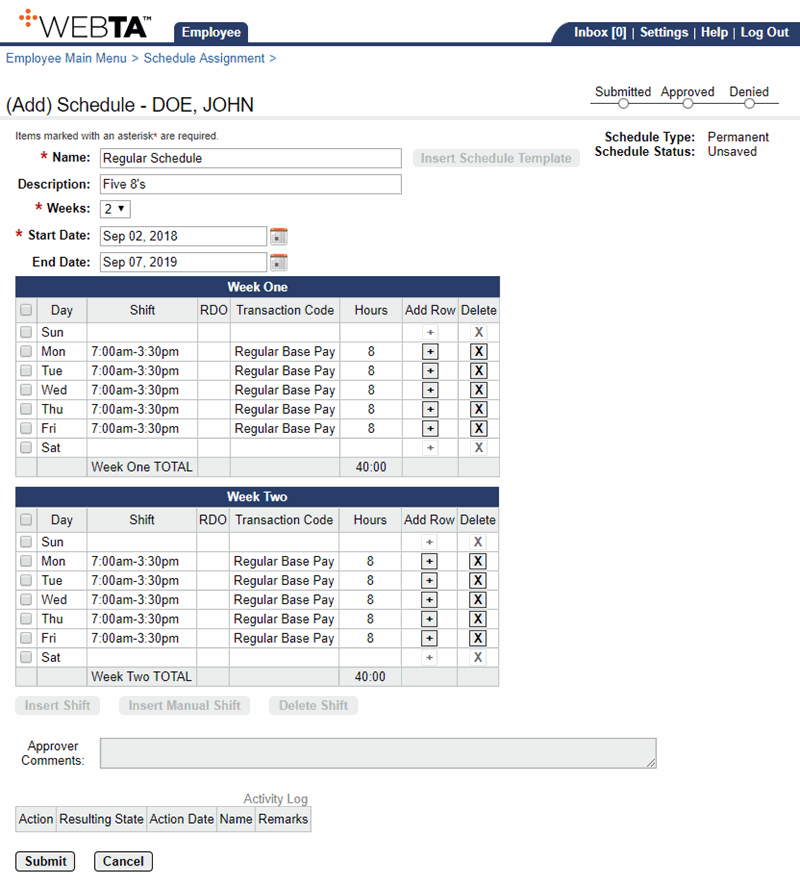
- Select the button to save the schedule. The message, , is displayed.
At this point, the following options are available:
Step
Description
Select the button
Returns you to the Schedule Assignment page.
Select the tab
Returns you to the Employee Main Menu page.
To Add a Temporary Schedule:
- Select the link from the Schedule section on the Employee Main Menu page. The Schedule Assignment page is displayed.

- Select the button. The (Add) Temporary Schedule page is displayed.
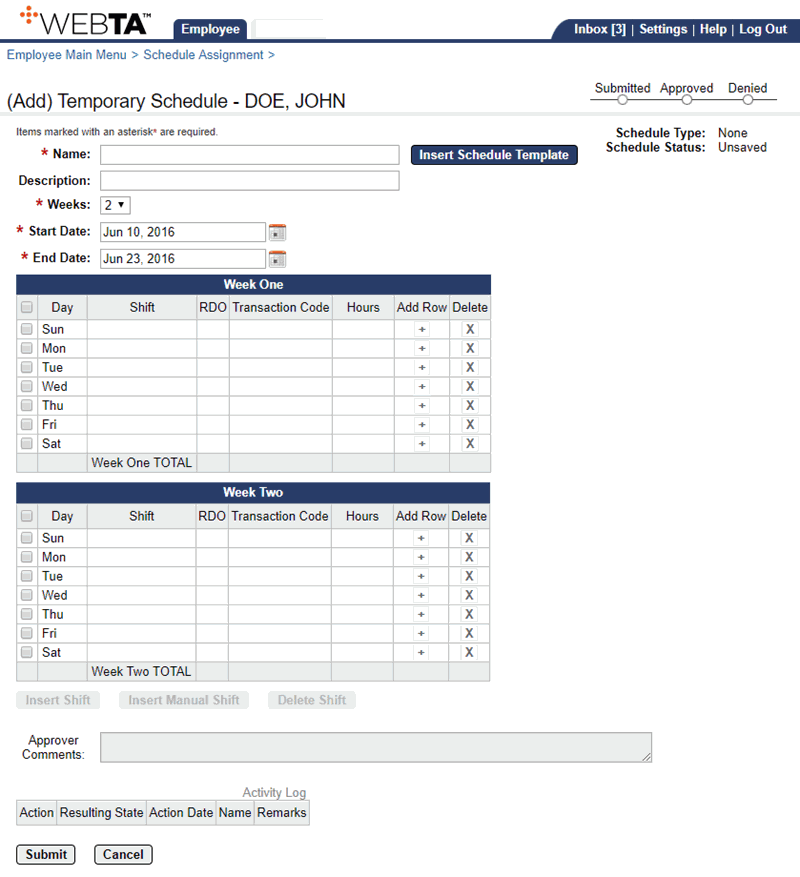
- Complete the following fields:
- Select the applicable day(s) for the schedule being added. The , , and buttons are activated above the Approver Comments box.
- Select the button to add a predefined shift. The Select Shift page is displayed.

- Select the applicable shift to insert. The shift displays on the day(s) selected.
- Select the button to save the schedule. The message, , is displayed.
At this point, the following options are available:
Step
Description
Select the button
Returns you to the Schedule Assignment page.
Select the tab
Returns you to the Employee Main Menu page.
To Edit a Schedule:
You may edit a predefined schedule or a manually created schedule on the (Modify) Schedule page.
- Select the link from the Schedule section on the Employee Main Menu page. The Schedule Assignment page is displayed.
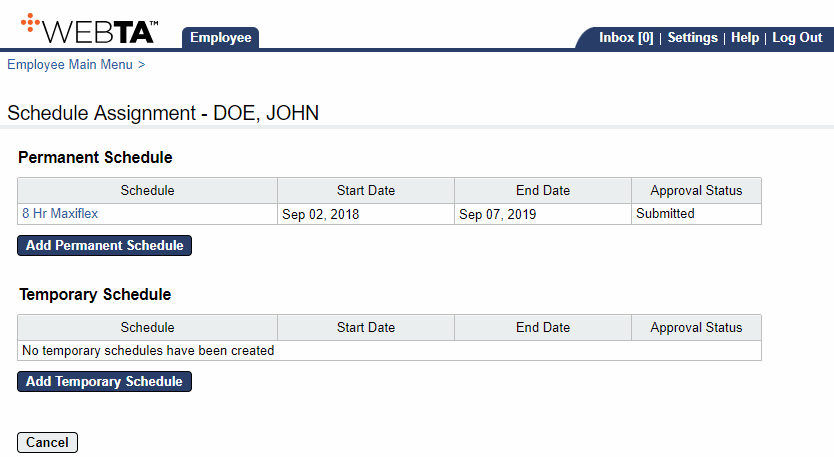
- Select the applicable schedule to edit under the Schedule column. The (Modify) Schedule page is displayed.
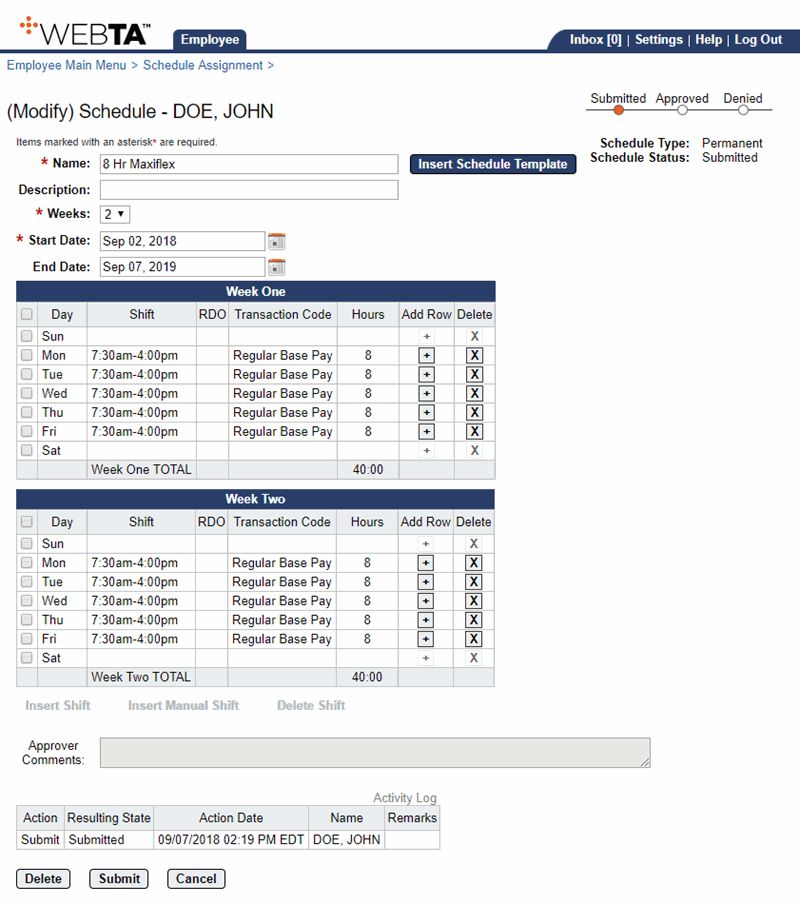
- Make the applicable changes.
- Select the button to save the changes. The message, , is displayed.
At this point, the following options are available:
Step
Description
Select the button
Returns you to the Schedule Assignment page.
Select the tab
Returns you to the Employee Main Menu page.
See Also |