Logging in for Federated Users
A Federated Agency uses eAuth to gain access to applications. Federated Agencies are those Agencies listed on the Choose an Agency drop-down list. A non-Federated Agency does not use eAuth to gain access to applications and will have to use PIV or Login.gov.
If the Agency accesses the application using the eAuth login, follow the steps below.
PIV (eAuth):
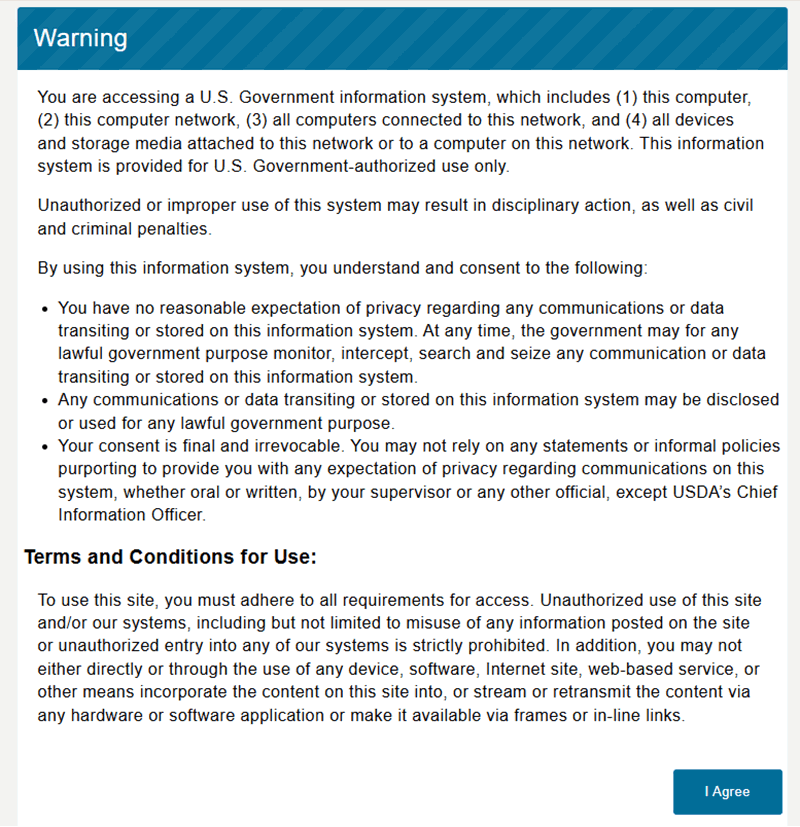
- To log in to EPP, connect to www.nfc.usda.gov/epps. The Warning Banner page is displayed.

Figure 34: Warning Banner Page
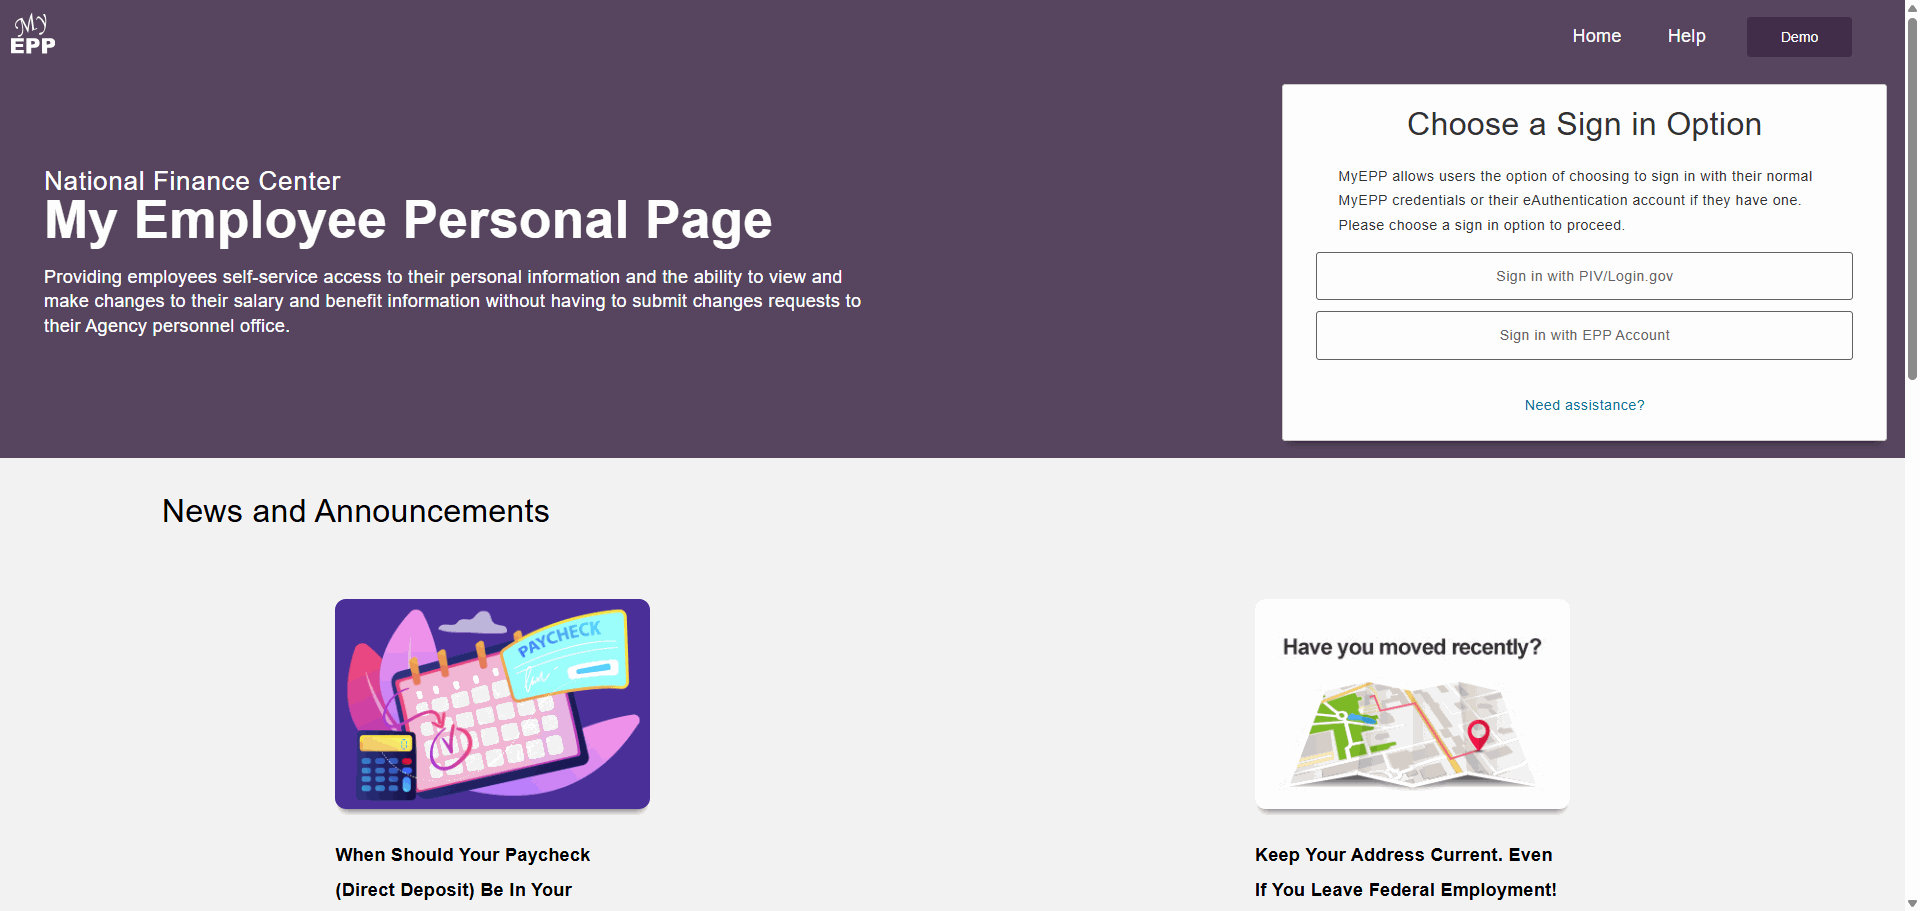
- Select the I Agree button. The My Employee Personal Page page is displayed.

Figure 35: My Employee Personal Page Page
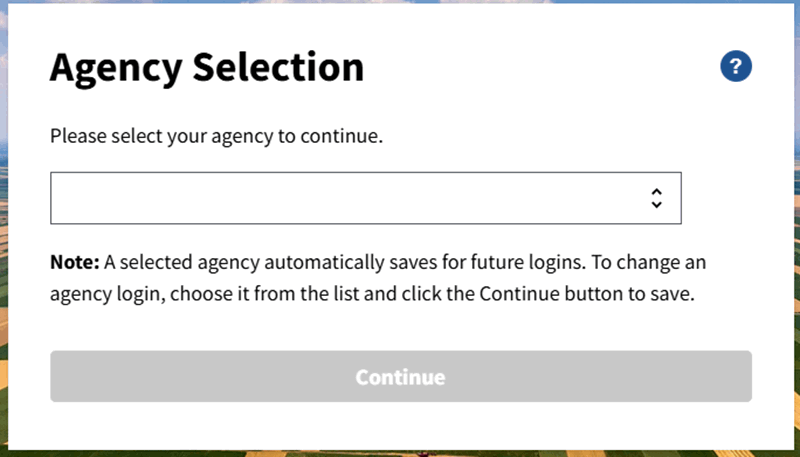
- From the Choose a Sign In Option menu, select Sign-in with PIV/Login.gov. The Agency Selection popup appears.

Figure 36: Agency Selection Popup
- Select the applicable Agency.
- Select the Continue button. The user is taken to the Agency Authentication page.
Note: USDA users will be directed to eAuth USDA Federal Login page.
- Follow the prompts as applicable.
- Select the Log In with PIV/CAC button to log in. The Select a Certificate page is displayed.
- Select the applicable certificate. The ActivClient Login popup is displayed.
- Enter your PIN.
- Select the OK button. You are connected to EPP.