Entering Direct Deposit Data
- To change or cancel net pay, select the Payroll Documents menu group.
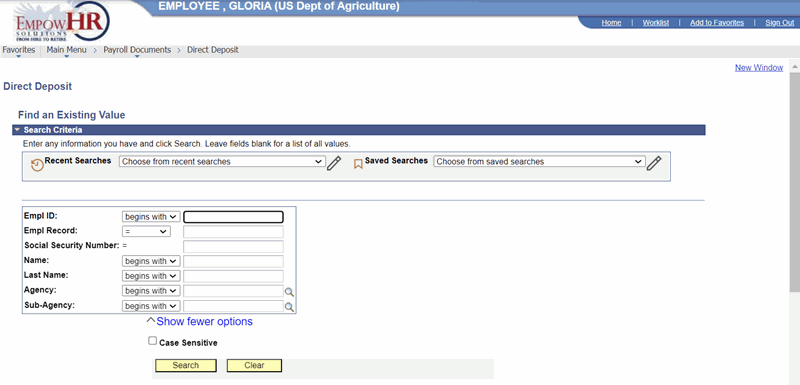
- Select the Direct Deposit component. The Direct Deposit page - Find an Existing Value is displayed. The information on this page allows the user to locate an existing employee to enter or change direct deposit information.
 Figure 14: Direct Deposit Page - Find an Existing Value
- Enter the search criteria.
- Select Search. The Direct Deposit page is displayed.
 Figure 15: Direct Deposit Page
- Complete the fields as follows:
|
Field |
Description/Instruction |
|---|---|
|
Name |
Populated from the Empl ID. |
|
Empl ID |
Populated from the search criteria entered. The employee name is displayed based on the Empl ID. |
|
Record |
Displays the number of records for the employee. |
|
SSN |
Populated from the search criteria entered. The employee SSN is displayed based on the Empl ID. |
- Complete the Direct Deposit fields as follows:
|
Field |
Description/Instruction |
|---|---|
|
Effective Date |
Required field. Enter a date or select a date from the calendar icon. This is the date on which a table record becomes effective; the date that an action begins. This date also determines when to view or change information. |
|
Pay Period |
Populated with the pay period that corresponds to the effective date. |
|
Date Entered |
Populated with the date the transaction was entered. |
|
User ID |
Displays the system identifier and name of the individual who generates the transaction. |
|
Transaction Status |
Defaults to In Progress and reflects that status of the transaction. The transaction status will change when the transaction is saved, in suspense, or resent to PPS. |
- Complete the Account Information fields as follows:
|
Field |
Description/Instruction |
|---|---|
|
Account Type |
Select the applicable account type for the direct deposit. Valid values are Checking and Savings. |
|
Routing # |
Required field. Enter the routing number for the direct deposit. |
|
Account # |
Required field. Enter the account number where the direct deposit should be applied. |
At this point, the following options are available:
|
Step |
Description |
|---|---|
|
Select the Save button |
Saves the new data entered. |
|
Select the Return to Search button |
Returns the user to the applicable page to search for another record. |
|
Select the Previous in List button |
Returns to the previous person in the list. |
|
Select the Next in List button |
Advances to the next person in the list. |
|
Select the Notify button |
Notifies the next individual in the workflow. |